
 8 MIN READ
 UPDATED OCT 30, 2026
How your organization connects its Safe multisig (formerly Gnosis Safe) to Toku so crypto payment batches can be proposed straight to your Safe. In the setup below, add the Toku address as a proposer, not as a Safe owner.
What this integration does
Connecting Safe lets Toku propose EVM payments from your organization's own Safe multisig. Key properties of the design:
- Configure Toku as a proposer, not an owner. Toku's setup check accepts the generated address when it is either a proposer/delegate or an owner, and it rejects an owner only for a 1-of-1 Safe. A higher-threshold Safe can therefore pass verification with Toku as an owner, so check the Safe member list and add the address only under Proposers. As a proposer, Toku signs and submits the proposal, but that signature is not an owner confirmation and cannot satisfy your Safe's approval threshold.
- Custody depends on the Safe role you assign. When the Toku address is configured only as a proposer, payout funds remain in the Safe until the required owners confirm and a signer executes the transaction. You can revoke that proposer access at any time in the Safe app. Do not add the Toku address as an owner.
- One proposer identity, one Safe per network. Toku uses a single proposer address across all networks for your organization, and you connect one Safe account per supported network.
- Verified before saved. When you attach a Safe, Toku checks on-chain that the Safe exists and that the generated Toku address is present as either a proposer/delegate or an owner. Because an owner can pass this check when the threshold is greater than 1, verification is not a substitute for checking the Safe member list and keeping Toku under Proposers only.
Before you start
| Requirement | Details |
|---|---|
| Toku access | A user with the Client Org Admin or Finance Admin role. If nobody on your team has one, ask your Toku contact. |
| Safe owner access | A Safe owner who can sign in the Safe app - adding a proposer requires an owner's signature (it's an off-chain signature, not a gas-paying transaction). |
| A deployed Safe | Your Safe must exist on a network that Toku supports and that is enabled for your organization. |
| Funded Safe + signers ready | The Safe holds the payout tokens; the signer who executes each payout pays that network's gas fee from their own wallet, so they need a little of the native token. |
Where to find it in Toku: open Admin Integrations → Payment Integrations → Safe (Gnosis) card. The card opens the setup window used throughout this guide.
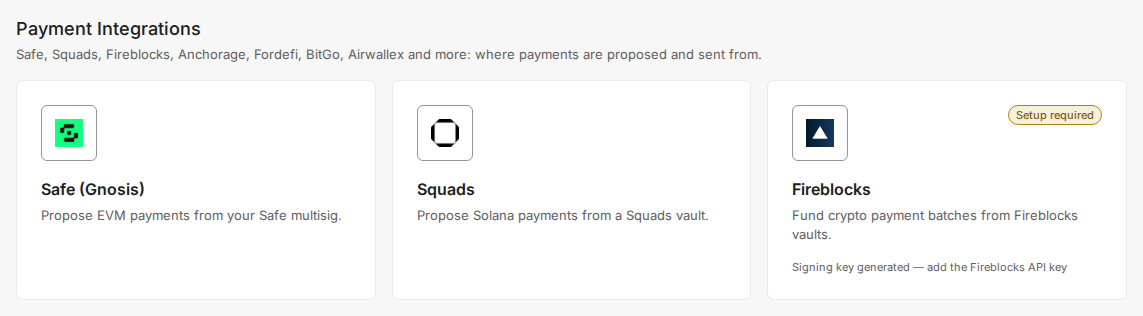
Step 1 - Generate the proposer identity (in Toku)
Click Generate keys in the Proposer identity section. Toku creates the proposer key pair server-side and stores the private key encrypted - what you work with is only the public proposer address.
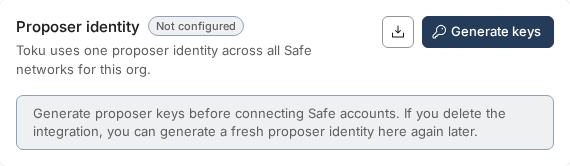
Once generated, copy the proposer address with the clipboard button - you'll paste it into the Safe app in the next step. This one address is used across all of your networks.
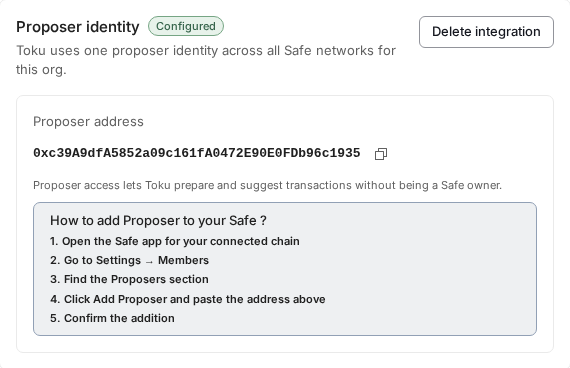
Step 2 - Add the proposer to your Safe (in the Safe app)
2a. Open your Safe's settings
Go to https://app.safe.global, open the Safe that will fund payouts, and navigate to Settings → Setup. Scroll to the Proposers section under Members and click Add proposer.
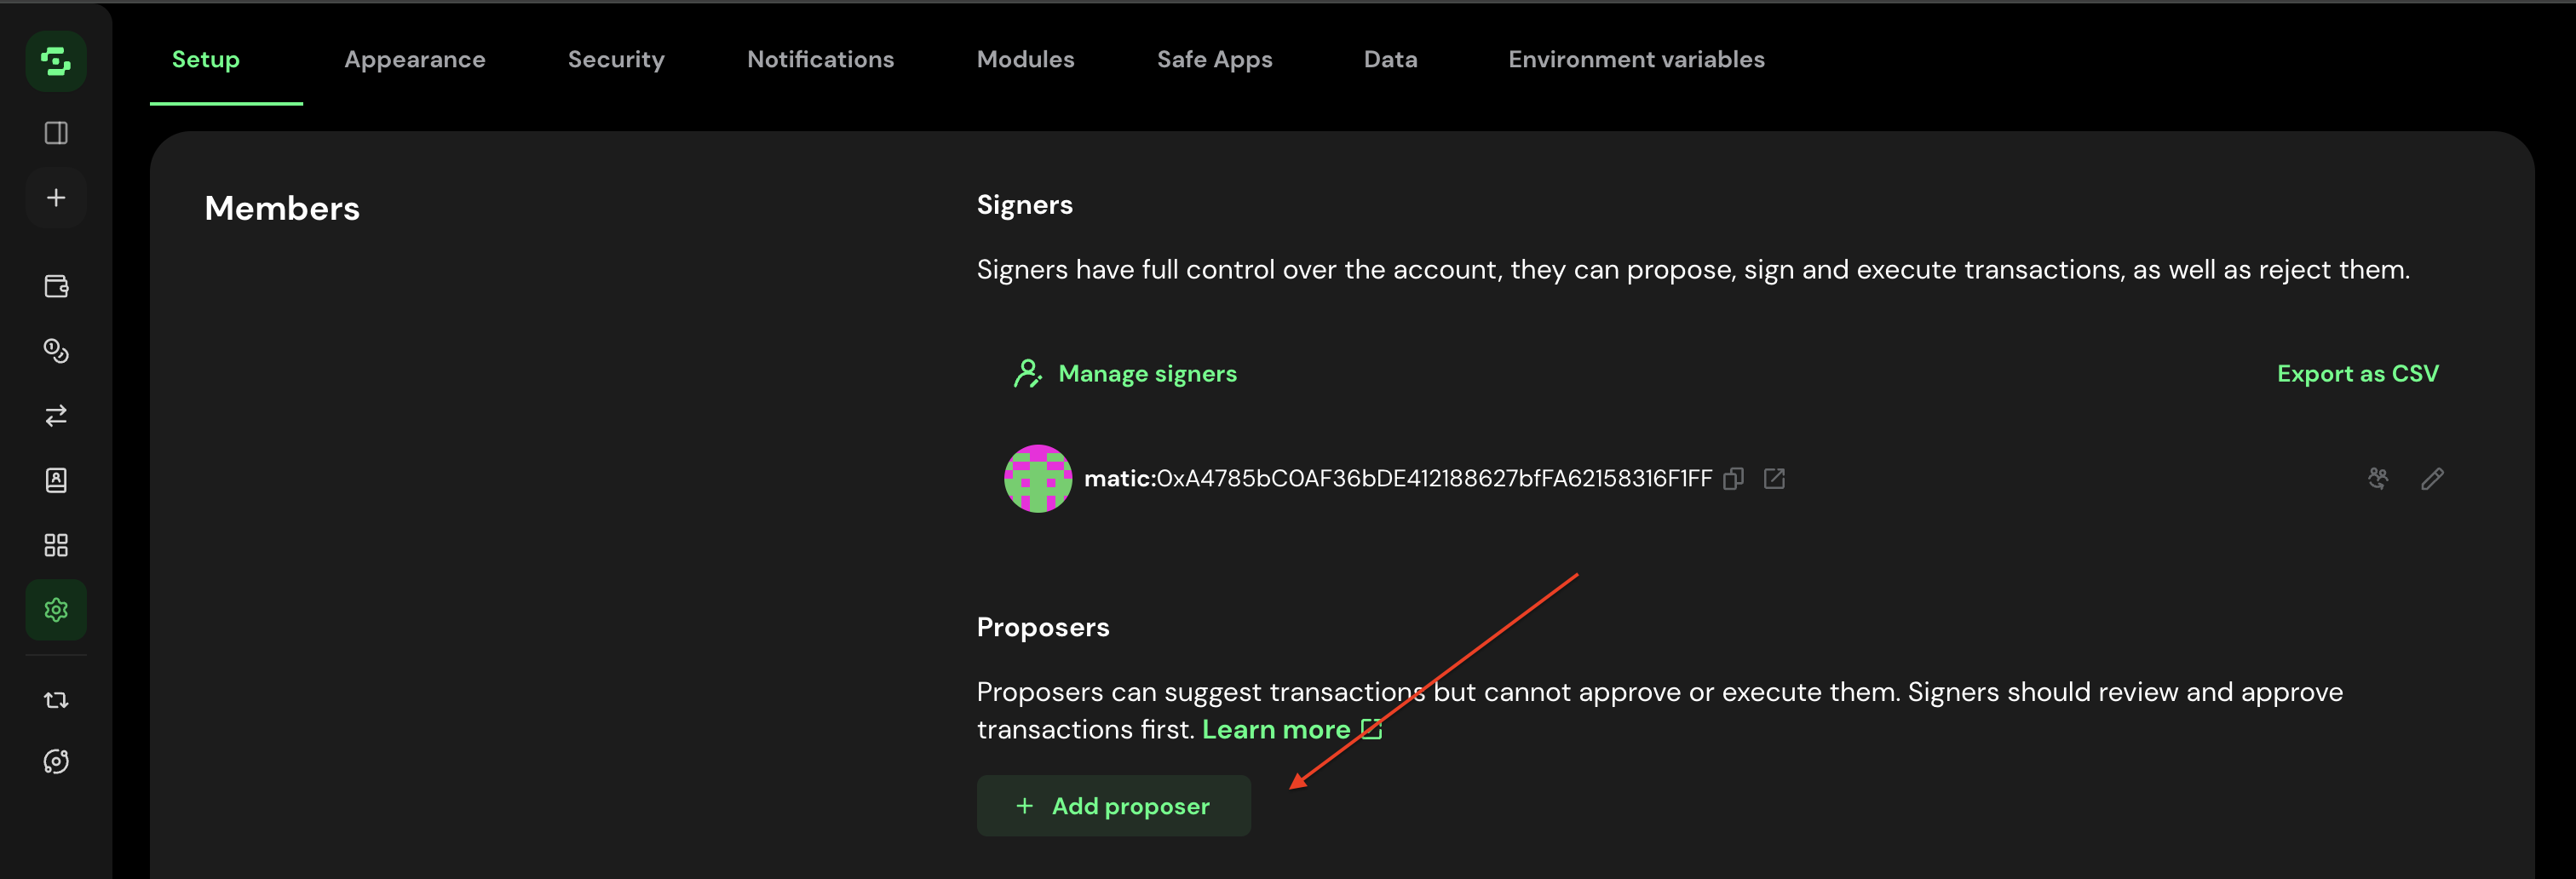
2b. Add the Toku proposer
Paste the proposer address you copied in Step 1, give it a recognizable name (e.g. toku-proposer), click Continue, and confirm with a signature from your connected owner wallet.
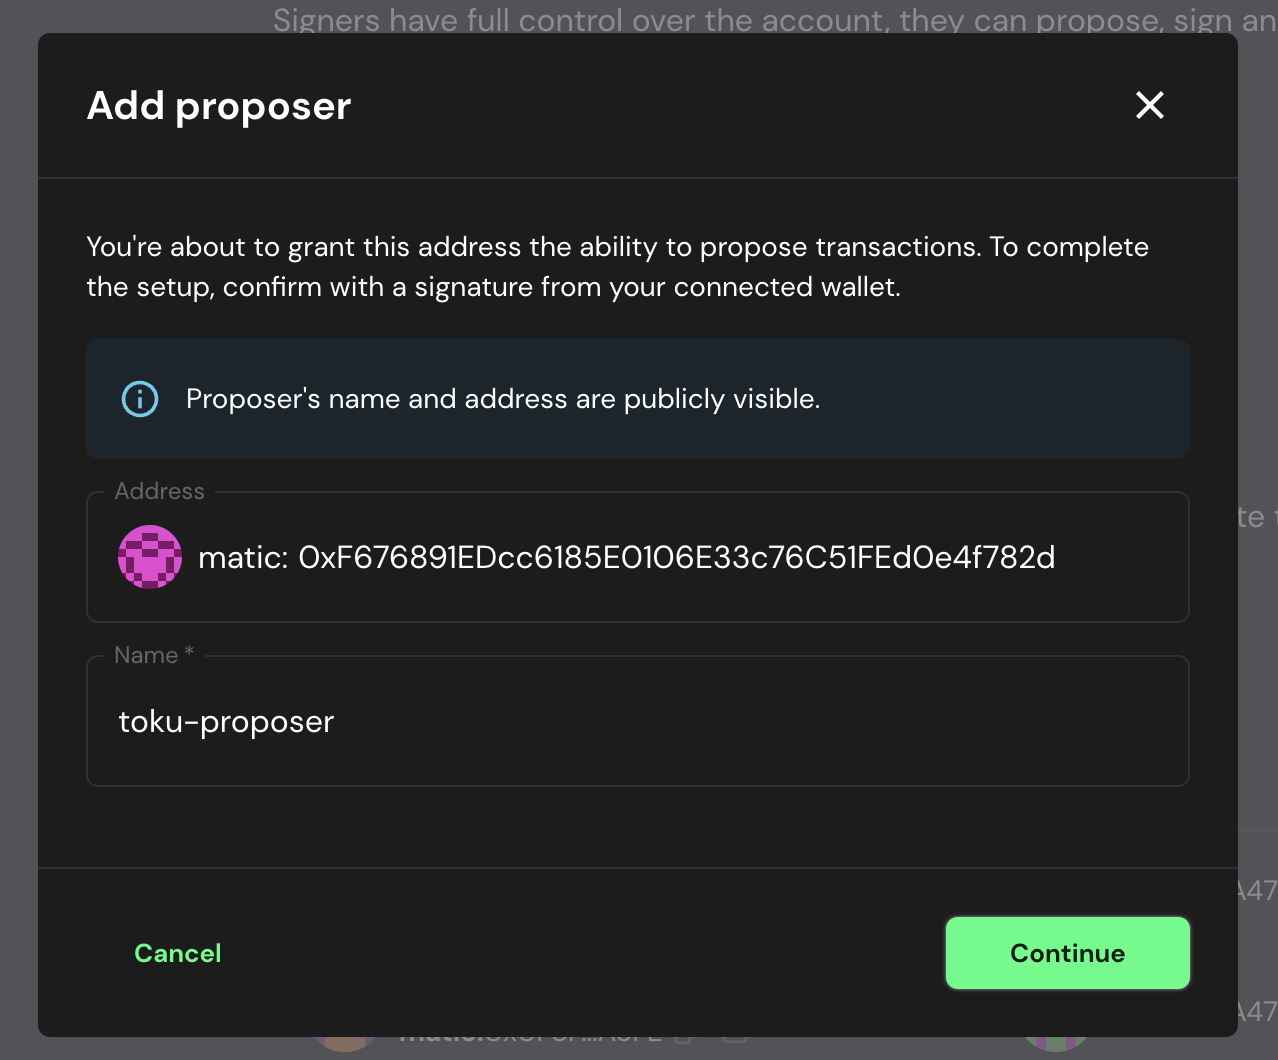
Two things to know:
- The proposer's name and address are publicly visible on your Safe - that's how Safe proposers work.
- If you use Safes on multiple networks, add the same proposer address to the Safe on each network you want to pay from.
Step 3 - Copy your Safe address
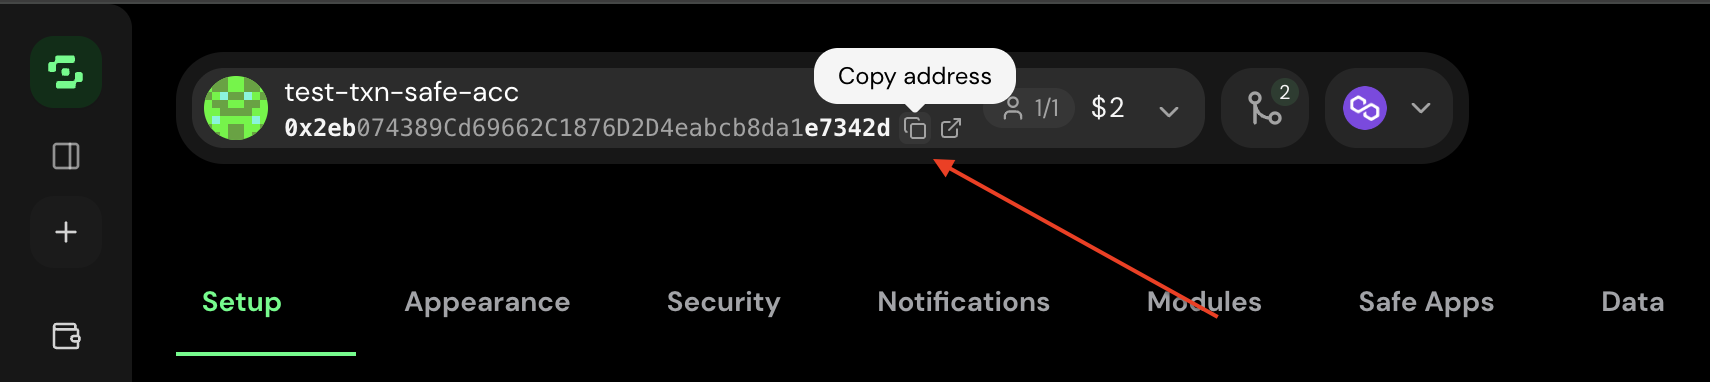
Copy the Safe's address from the header of the Safe app (the copy icon next to the 0x… address). If you copy it with a network prefix like matic:, paste only the part starting with 0x into Toku.
Step 4 - Attach and verify the Safe in Toku
Back in the Toku setup window, under Safe accounts by network, click Add Safe account:
- Choose the network the Safe is deployed on (the list shows the networks enabled for your organization).
- Paste the Safe address from Step 3.
- Click Verify and save.
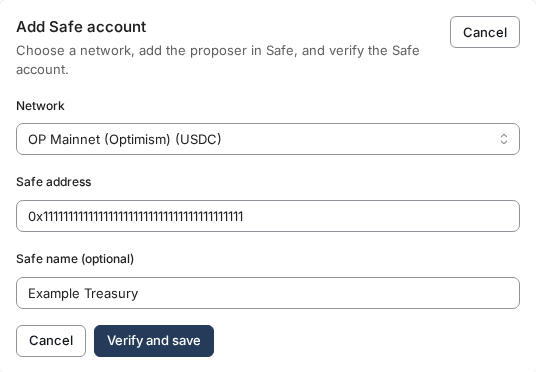
Verification checks that the Safe exists on the selected network and that the generated Toku address is present as either a proposer/delegate or an owner. If the address is missing, nothing is saved. Because owner status can pass when the threshold is greater than 1, check the Safe member list after verification: Toku should appear under Proposers, not Owners.
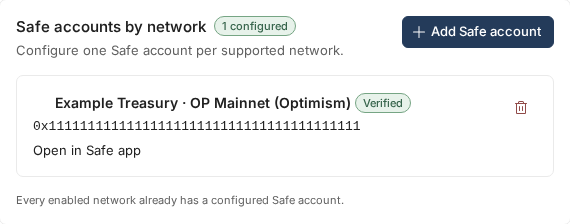
On success the network appears with a Verified badge. Repeat Add Safe account for each additional network - one Safe per network.
Confirm it's live
- [ ] Proposer identity shows Configured, and each network you added shows Verified (with an Open in Safe app link).
How payouts work once connected
- When a payment batch is paid via Safe, Toku proposes the transaction to your Safe using its proposer identity - nothing moves yet.
- Your signers see the proposed transaction in the Safe app queue, review it, and confirm it according to your Safe's threshold (e.g. 2 of 3).
- Once the threshold is met, a signer executes the transaction (paying that network's gas fee), the funds leave the Safe, and Toku records the payout as complete. With the Toku address configured only as a proposer, Toku cannot satisfy the Safe's owner threshold by itself. An unconfirmed proposal remains pending in the Safe queue until the required owners confirm it and a signer executes it.
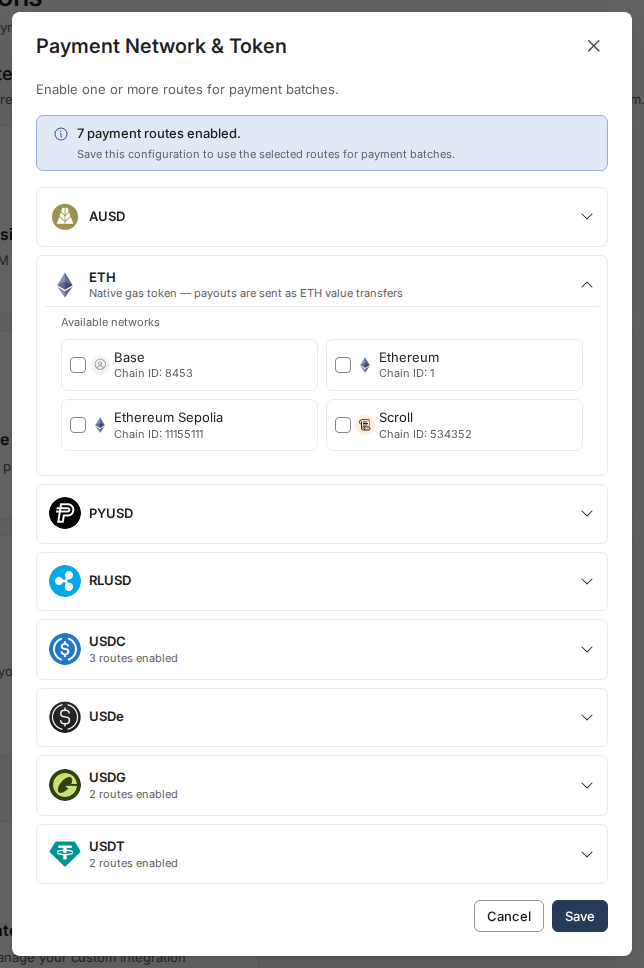
Direct Safe payment routes can pay a supported stablecoin or the network's own supported native token, such as ETH on Scroll. This applies only when the configured Safe directly holds and sends the payout funds. Nested or omnibus Safe execution does not support native-token transfers; those routes currently support token-contract transfers only.
Maintenance: removing and re-connecting
| Action | How / effect |
|---|---|
| Remove one network's Safe | Click the Remove Safe account (trash) icon next to that network in the Toku setup window. Only that network is detached - the proposer identity and other networks stay in place. |
| Revoke Toku's proposer access | Remove the proposer from your Safe in the Safe app (Settings → Setup → Proposers). Toku can no longer propose payouts on that Safe until it's re-added. |
| Delete the integration | Removes the proposer identity and every configured Safe account in Toku. You can generate a fresh proposer identity later - but it will be a new address, so you'd need to add it as a proposer in each Safe again (and can remove the old one in the Safe app). |
Troubleshooting
| Symptom | Likely cause → fix |
|---|---|
| “Proposer not found on this Safe” when verifying | Step 2 wasn't completed on this network's Safe - add the proposer address in Safe Settings → Setup → Proposers, then click Verify and save again. |
| Verification says the Safe can't be found | The address has a typo, or the Safe isn't deployed on the network you selected - double-check both. Remember to strip a matic:-style prefix from the pasted address. |
| “Enter a valid EVM Safe address starting with 0x” | The address must be the 42-character 0x… form. |
| The network dropdown is empty | No Safe-supported network is enabled for your organization yet - contact your Toku account manager to enable one. |
| “Every enabled network already has a configured Safe account” | Nothing to add - all your enabled networks are connected. |
| A payout has been pending for a while | It's waiting in your Safe transaction queue — your signers need to confirm and execute it in the Safe app. |
| Execution fails in the Safe app | Usually gas or funds: the executing signer's wallet needs the network's native token for gas, and the Safe must hold enough of the payout token. |
Questions or a step that doesn't match what you see? Contact your Toku account manager or support - we're happy to walk through the setup together.