
 4 MIN READ
 UPDATED OCT 30, 2026
⚠️ Contractor invoice and payment deadlines: late action means late payment
- Contractors: submit invoices by the 19th of each month. A saved draft is not a submitted invoice.
- Admins: approve invoices by the 21st of each month. Submission alone does not authorize payment.
- Funding: Toku must receive cleared funds 4 - 5 business days before payout. Initiating a transfer or sending proof of payment does not meet the deadline.
- Standard monthly payout: the last day of the month, provided submission, approval, and funding deadlines are met. Late submission, approval, or funding will delay payment. Every day of delay pushes payment back by at least one day. A missed payment cycle can cause a longer delay; the invoice due date is not a guarantee of payment.
Automation does not remove these deadlines. Earlier published holiday deadlines take precedence; see Toku: 2026 End-of-Year Payroll & Payment Guide.
📘 For employees and contractors receiving crypto payouts on Toku. Last updated October 30, 2026.
Add your crypto wallet address to Toku so payouts can be sent to it.
Before you start
- You're signed in to Toku with your contributor email and password.
- You have your wallet address copied from your wallet app (never type it by hand).
- You know which network your wallet uses (Ethereum, Solana, Polygon, etc.) - check your wallet app if unsure.
- If your organization requires two-factor authentication (2FA), you've already set it up in your account security settings.
Add your wallet
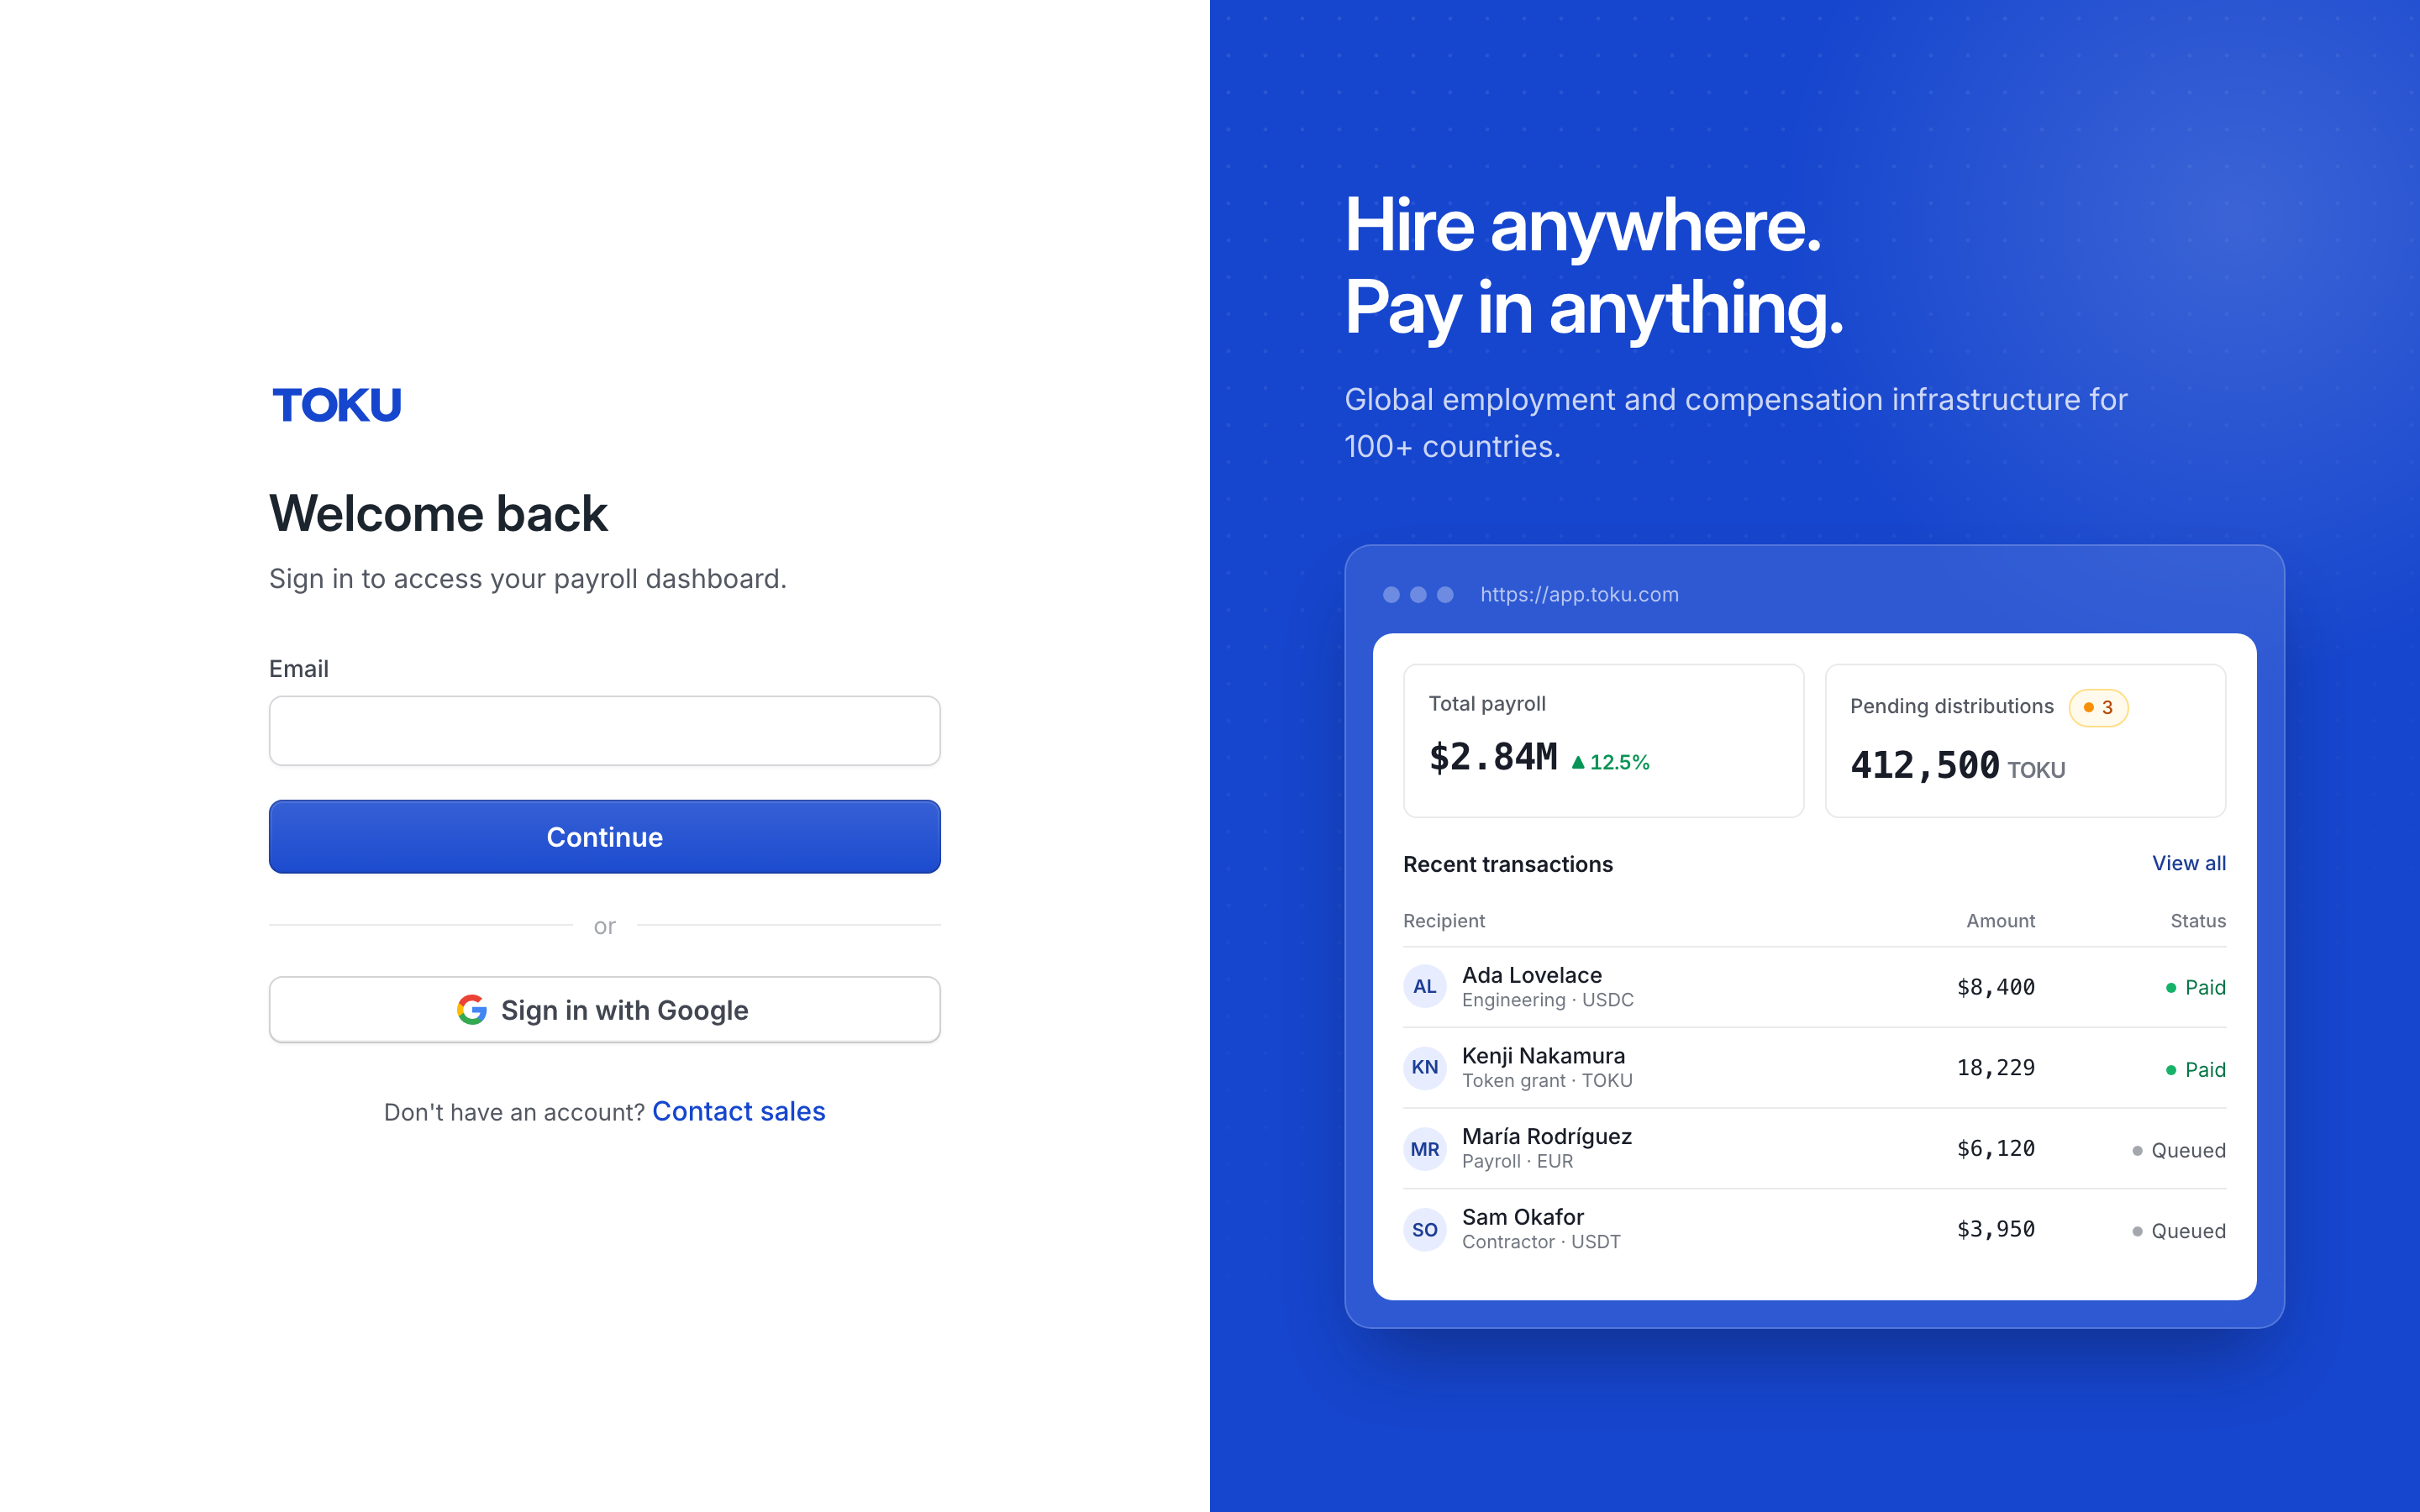
- Go to app.toku.com. You see Welcome back and a single Email box - there are no product tabs to choose any more.
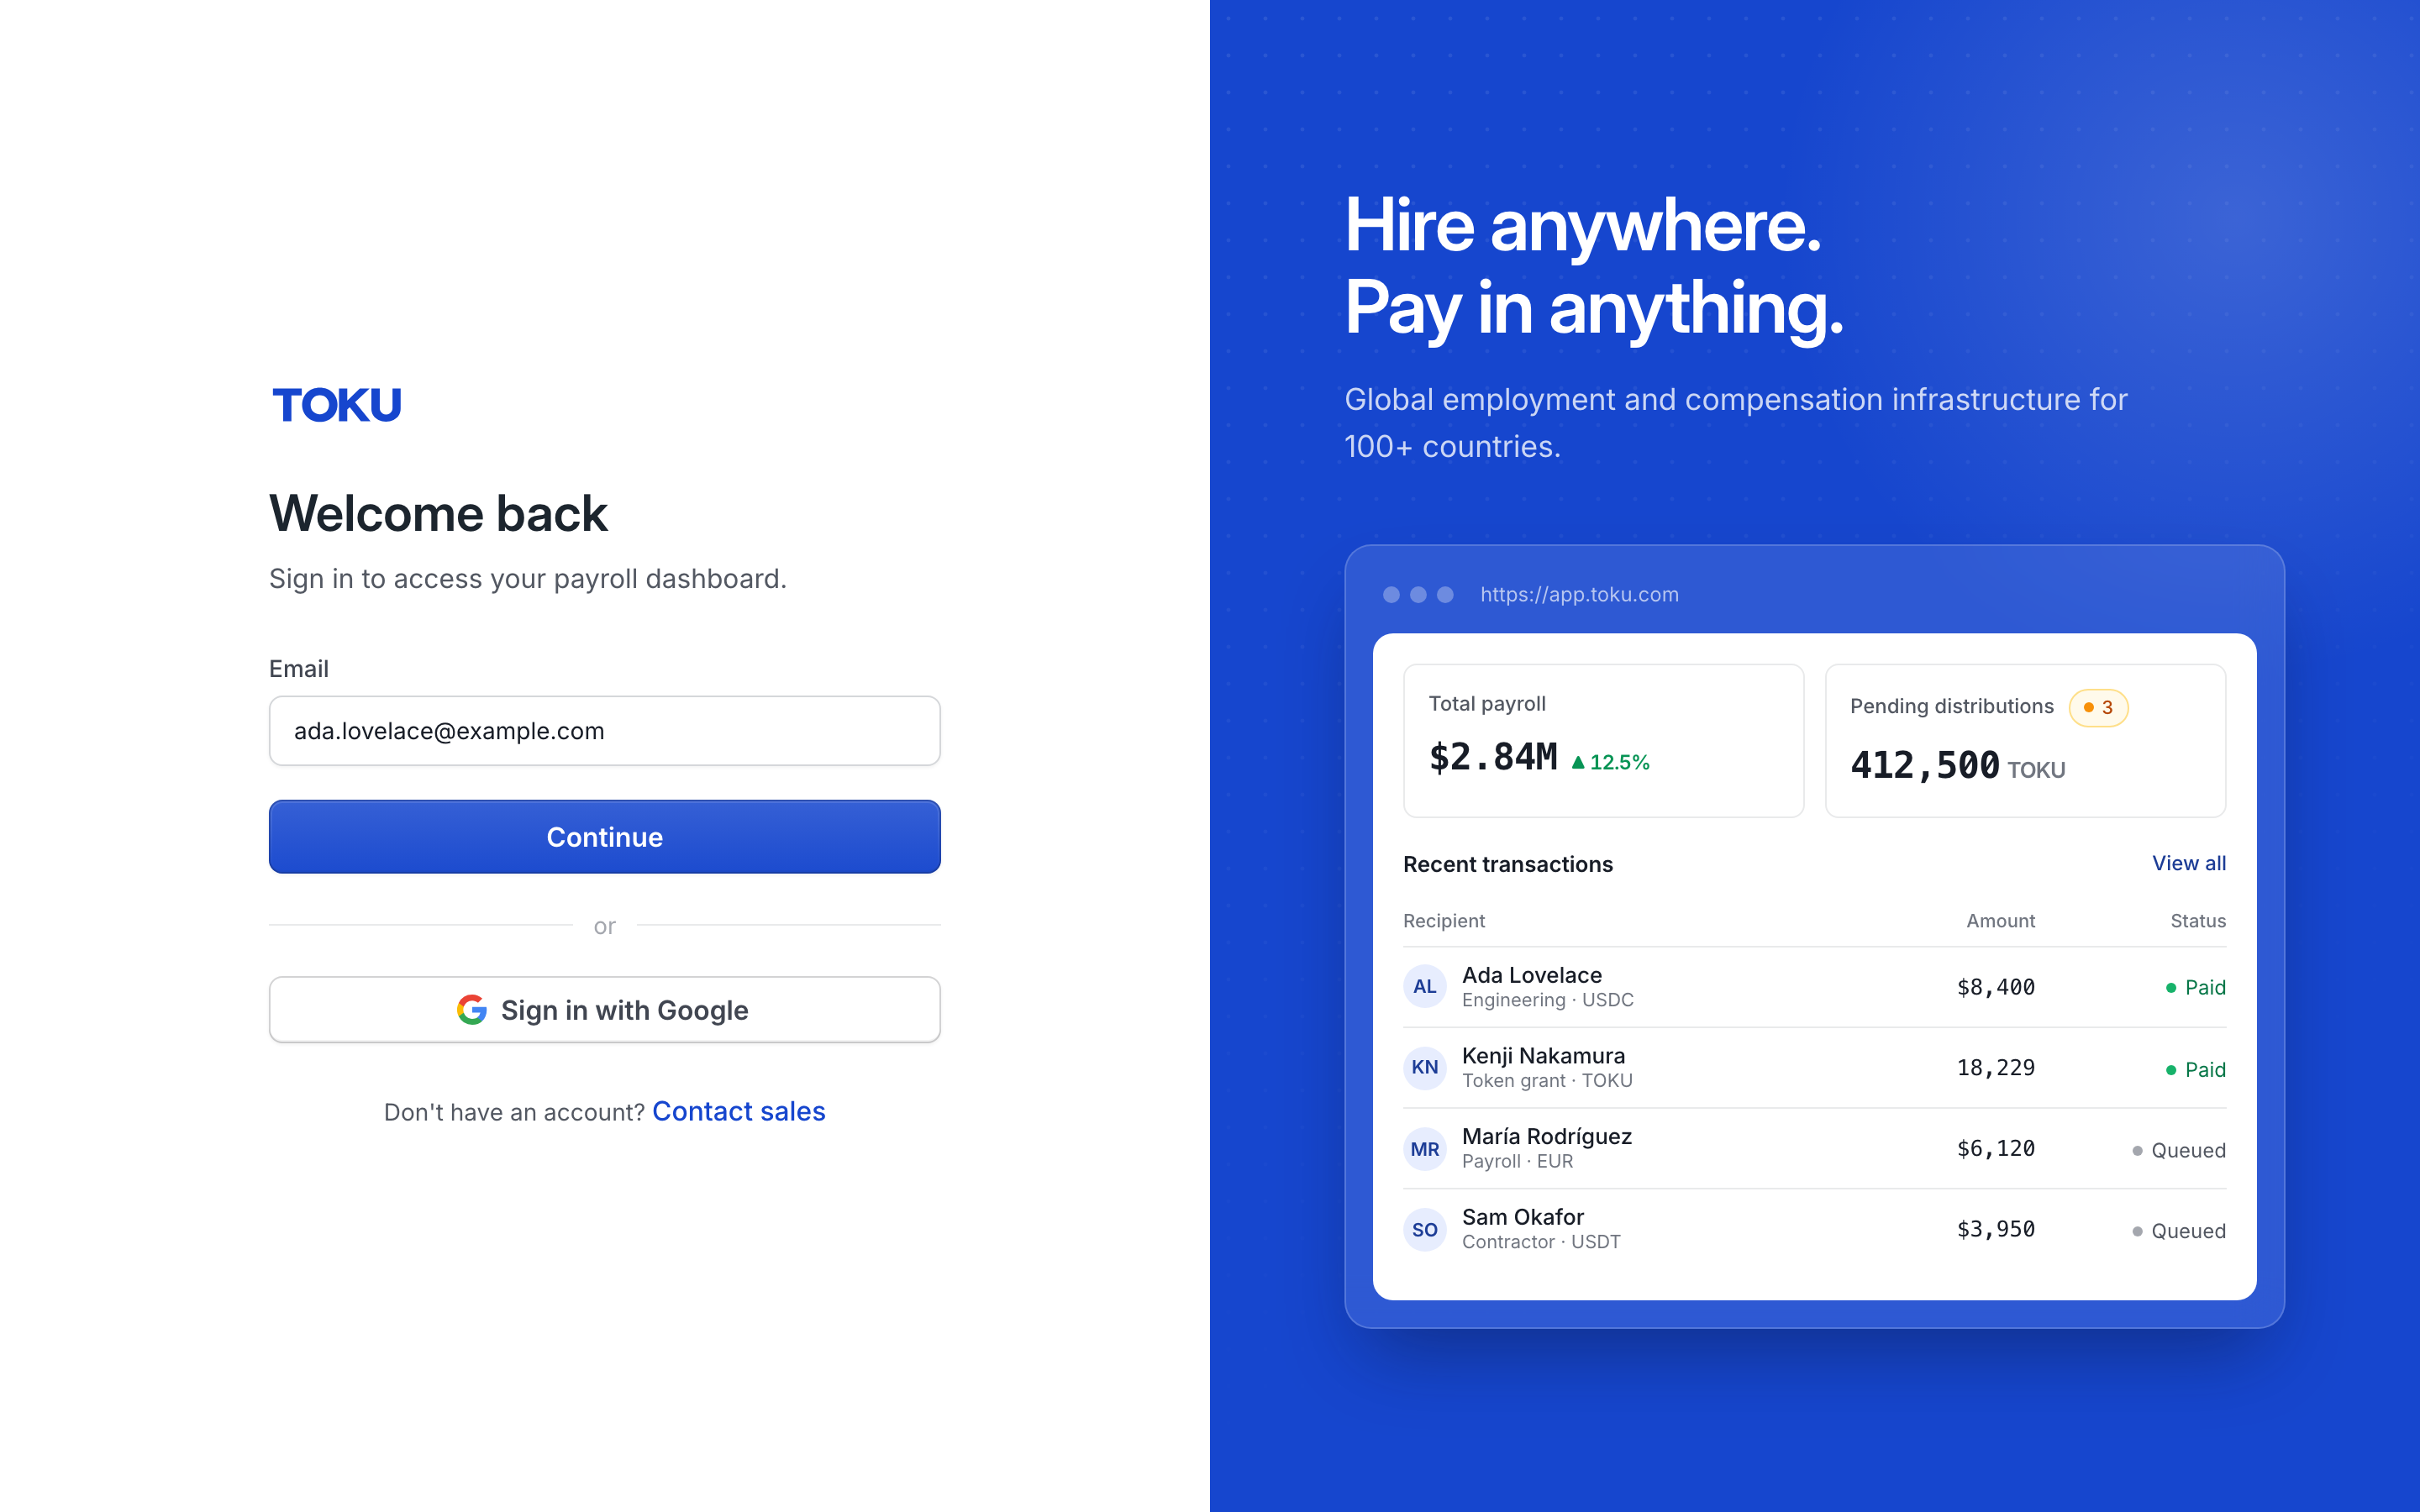
- Enter your email and select Continue, then enter your password and click Sign in. If you see a role chooser, pick your name and click Continue.
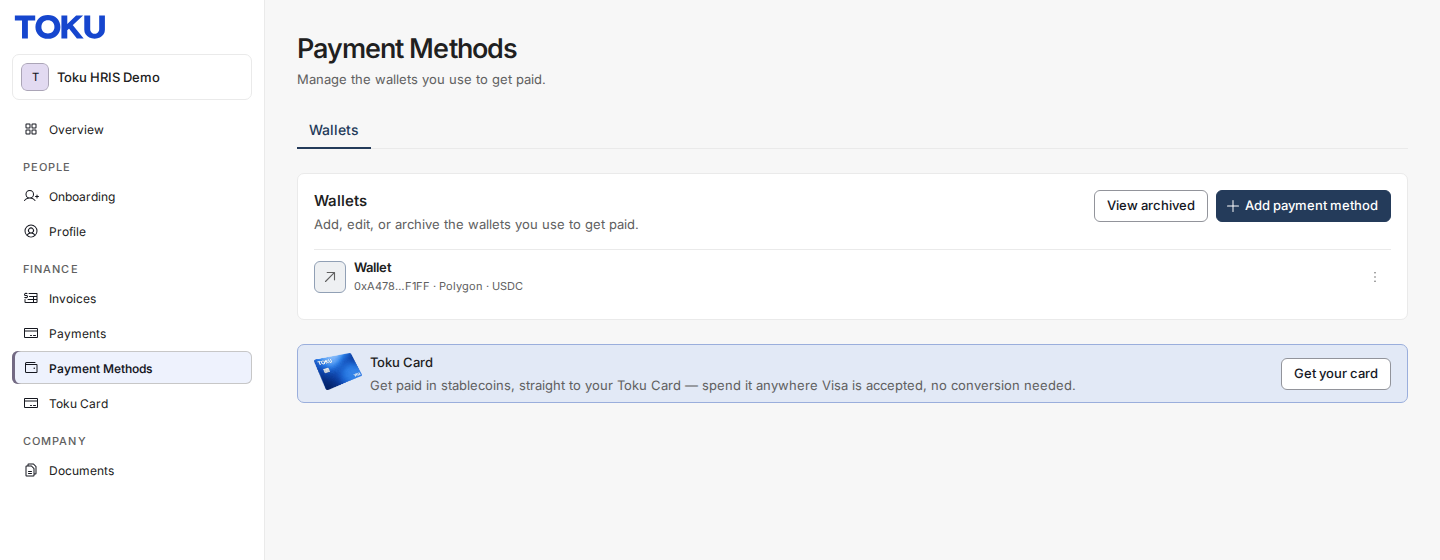
- Click Payment Methods in the left menu. If you don't see it, your organization may not have crypto payouts enabled for your role - contact them to confirm.
- On the Payment Methods page, click the Add payment method button in the top-right corner of the Wallets card (Wallets & Banks if your organization also pays you by bank).
- In the window that opens, click Add External Wallet to enter your address manually (this only records your address, it doesn't connect to your wallet).
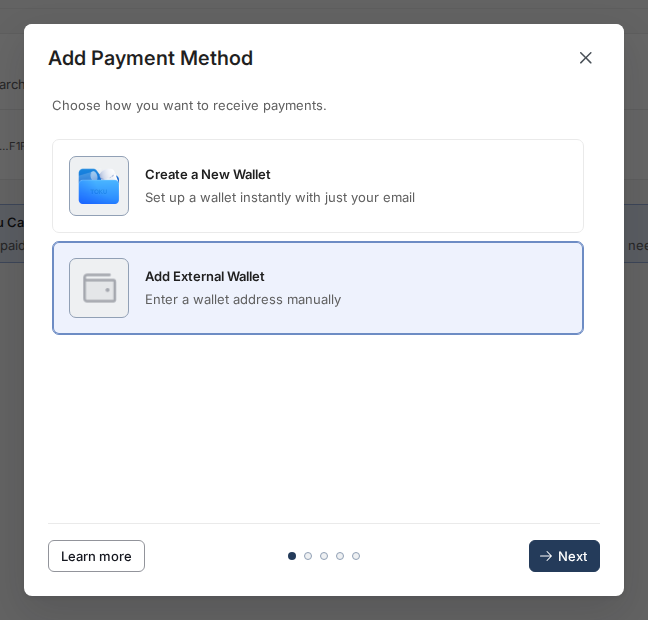
- Click Next.
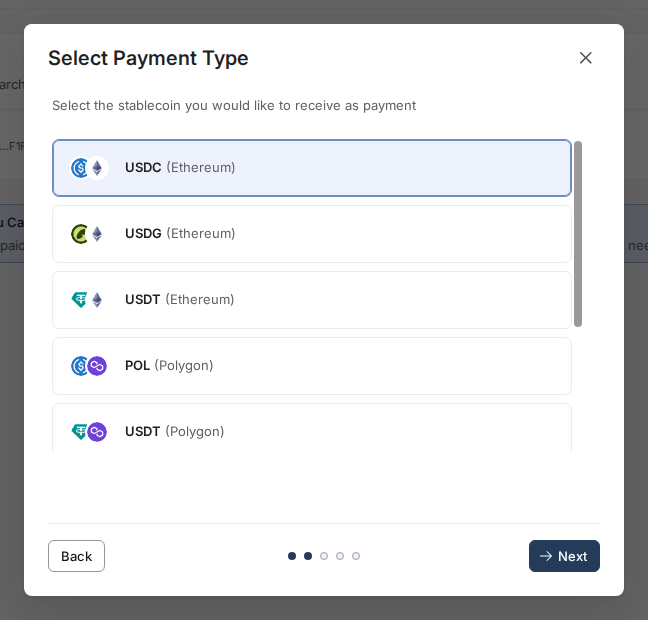
- Select the stablecoin and network you want to be paid in (e.g., USDC (Ethereum)) - the network is shown in parentheses. Click the row that matches your wallet's network.
- Click Next.
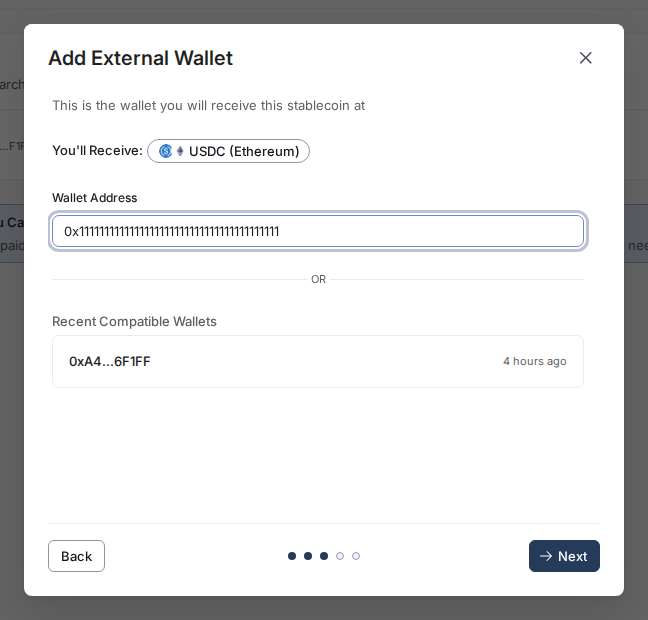
- Paste your wallet address into the Wallet Address field, or pick it from Recent Compatible Wallets if you've used it before. Before proceeding, compare the first 6 and last 6 characters against your wallet app - money sent to the wrong address cannot be recovered.
- Select Next. If your organization has two-factor authentication turned on, you'll be asked for your 6-digit authenticator code before the wallet is created.
- You land on the Verify Wallet screen. Toku sends a small test transaction to your address - this is normal and the amount is yours to keep. While it's still processing you'll see "Your wallet was created but the test transaction is still being processed"; once it posts, the screen shows the transaction with a blockchain explorer link. Confirm you received it, then select Verify to finish.
Good to know
- A wallet address is public information and safe to share - Toku never connects to your wallet or controls it.
- You will never be asked for your password, private key, seed phrase, or recovery phrase. Stop and contact support if anything asks for these.
- Toku keeps one active wallet per network-and-coin combination. To switch wallets, open the ⋯ menu on the old wallet and choose Archive (or Cancel Request if it's still pending), then add the new wallet using these steps.
- Your new wallet appears in the Wallets list with a Pending badge until verification is complete.
Still stuck?
You can email customer-success@toku.com to reach our support team. Please include your email address, organization name, and a description of what happened. Screenshots and videos are always welcome to speed up the troubleshooting process. Feel free to reach out any time for further assistance.