
 4 MIN READ
 UPDATED OCT 30, 2026
📘 For organization administrators on Toku. Last updated October 30, 2026.
Review submitted expense reports from your team and approve or reject them for reimbursement.
Before you start
- You need administrator access to your organization account.
- Review expenses regularly to ensure timely reimbursement - the approval date determines when employees get paid.
- For employees, approvals between the 1st - 15th pay out by end of month; approvals after the 15th pay out on the 15th of the next month.
Open the Expenses review page
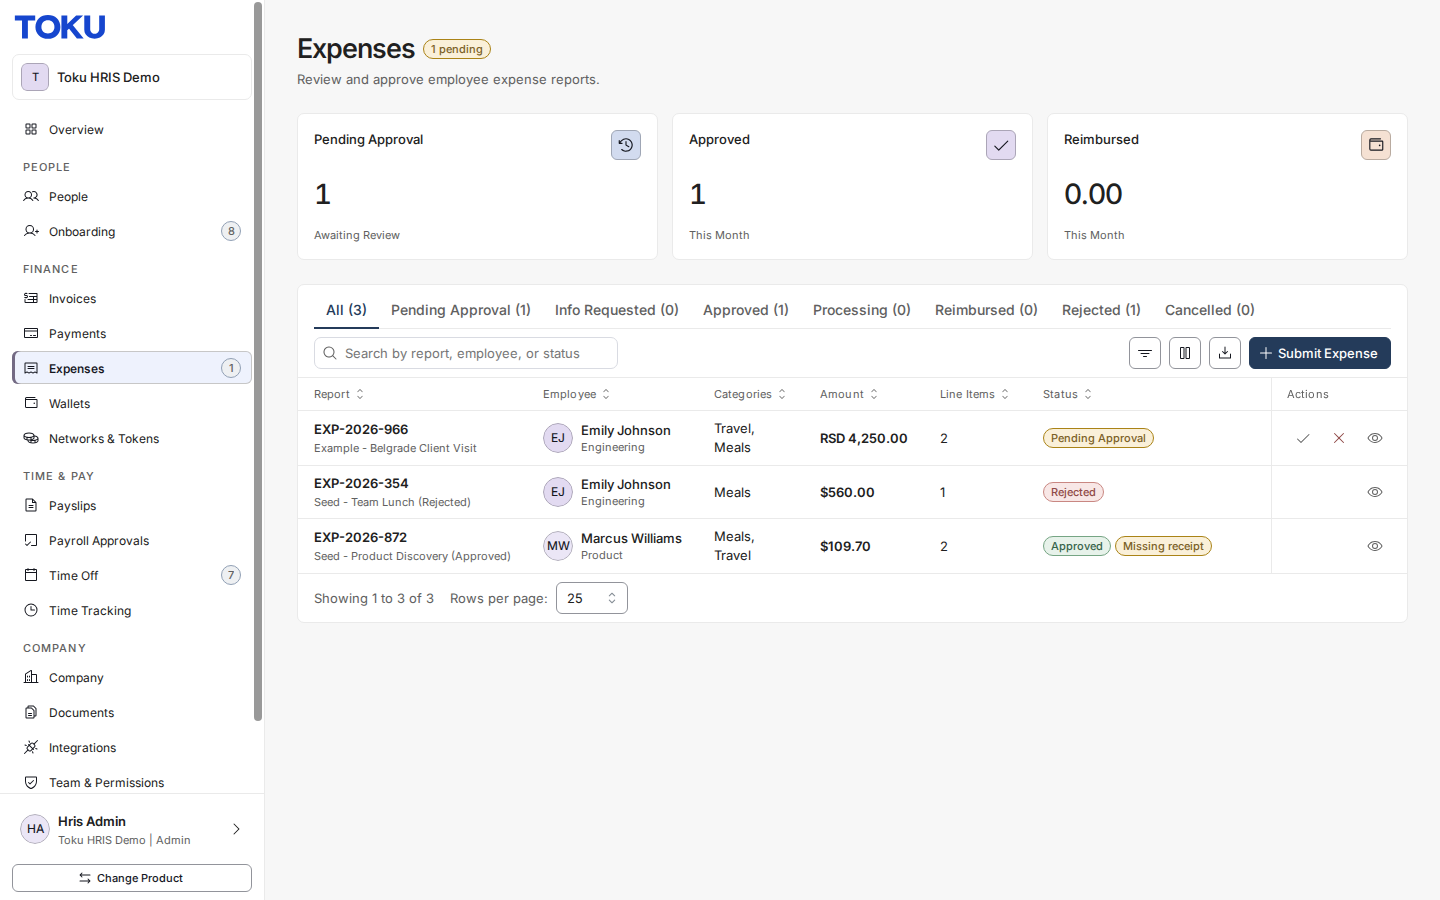
- Log in to Toku at https://app.toku.com. Click Expenses in the left-hand menu - a number badge shows how many reports are waiting for you.
Review a submitted report
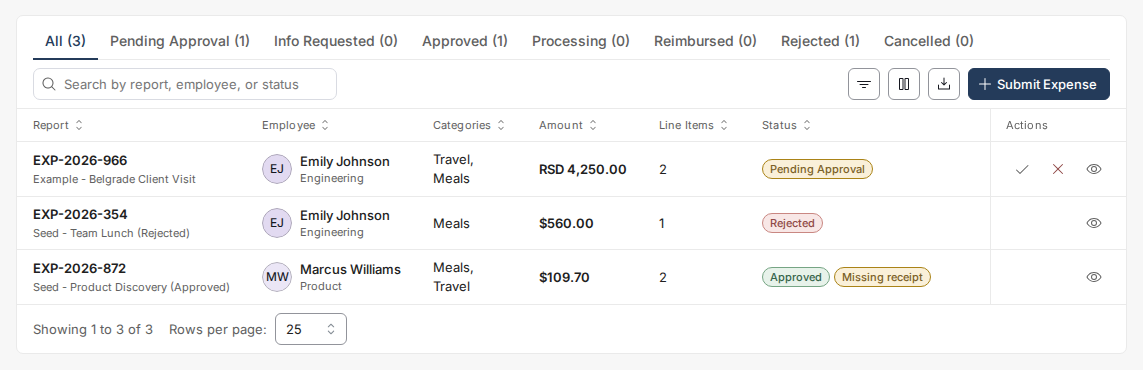
- Find the report in the table - the Pending Approval tile shows how many are awaiting review. Click the eye icon in the Actions column to view the report's details.

Approve an expense
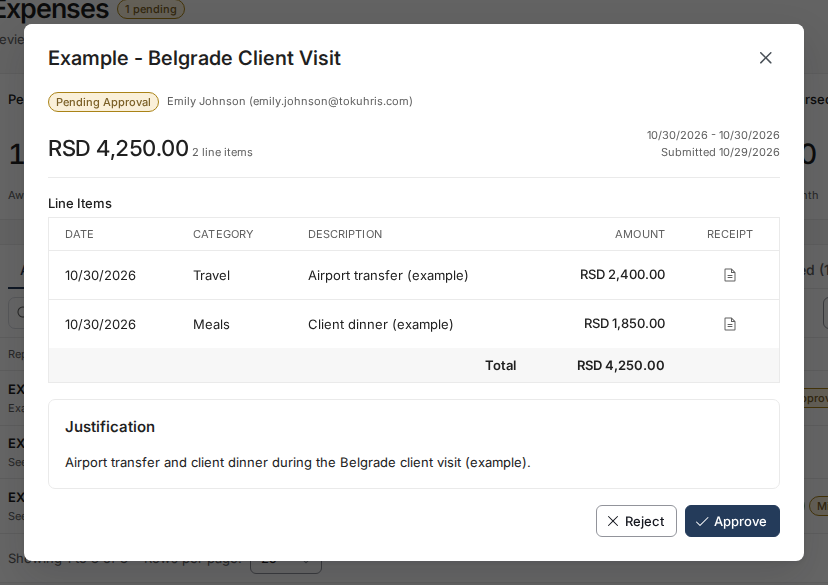
- After confirming the expense is valid and business-related, click Approve at the bottom of the report's detail view. You can also approve directly from the list, without opening details, by clicking the check icon in the Actions column - either way it approves immediately, with no confirmation step.
Reject an expense
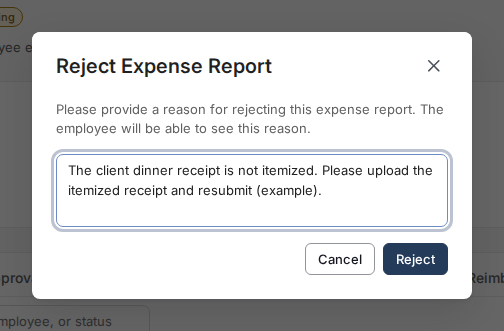
- If the expense is missing a receipt, lacks a proper description, or is not business-related, click the red X in the Actions column (or Reject in the detail view). A Reject Expense Report dialog opens asking for a reason - it's required, and the employee will see exactly what you type. Enter the reason and click Reject; the report returns to the employee as Rejected.
Submit an expense for an employee
As an administrator you can enter an expense report on an employee's behalf, for example when someone sends you their receipts. The report is created in that employee's name and goes through the same approval as one they submit themselves.
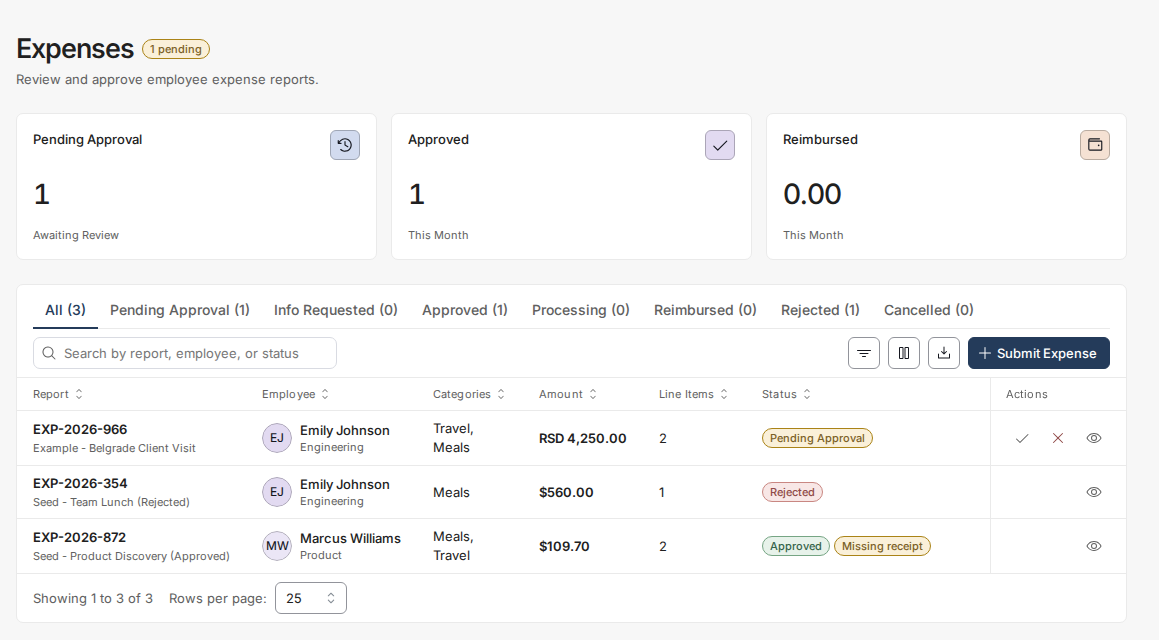
- On the Expenses page, click Submit Expense in the top right. The Expense Report window opens.
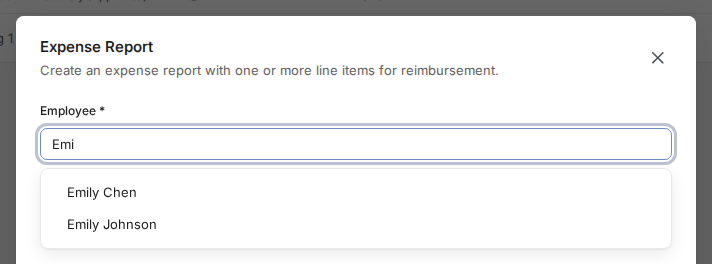
- In Employee, type a few letters of the person's name and select them from the list. Only current employees of your organization appear, and only administrators see this field.
- Enter a Report Title and optionally set the Report Period the report covers. Toku reimburses in the employee's contract currency.
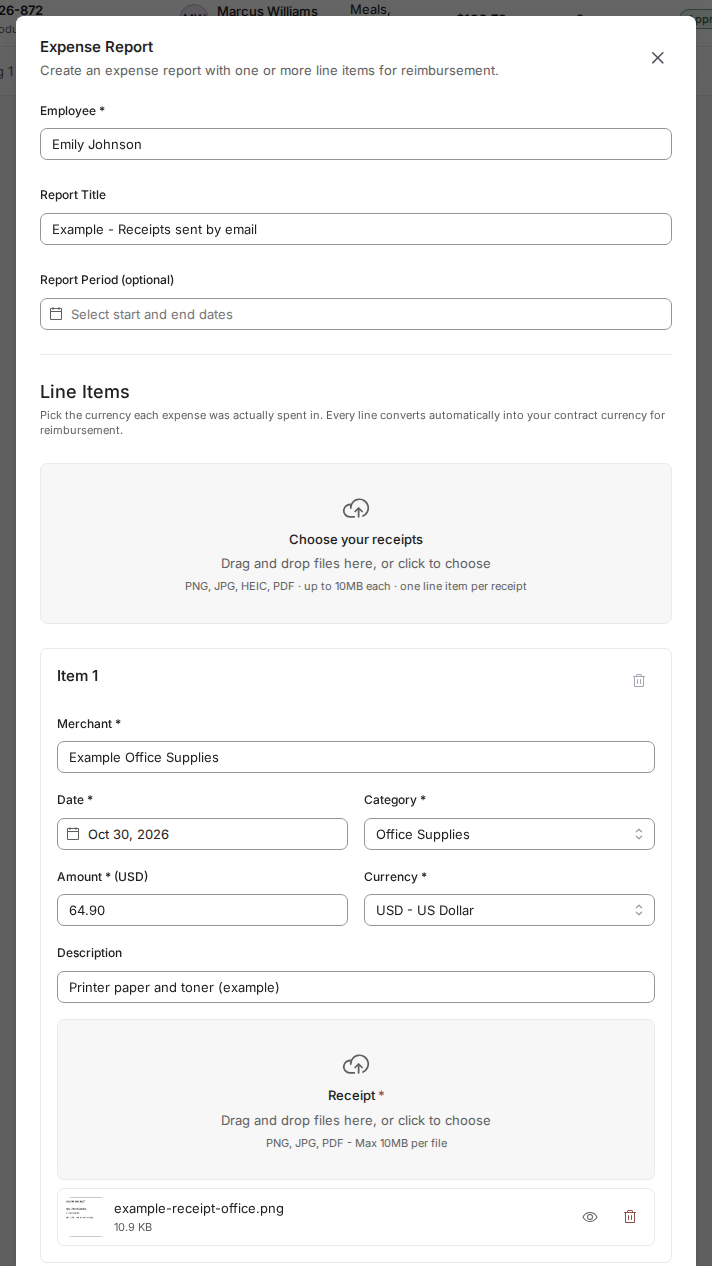
- Under Line Items fill in each expense: Merchant, Date, Category, Amount, Currency (the currency the employee actually paid in), an optional Description, and the required Receipt. Click Add Item for every further expense - one report holds as many line items as you need.
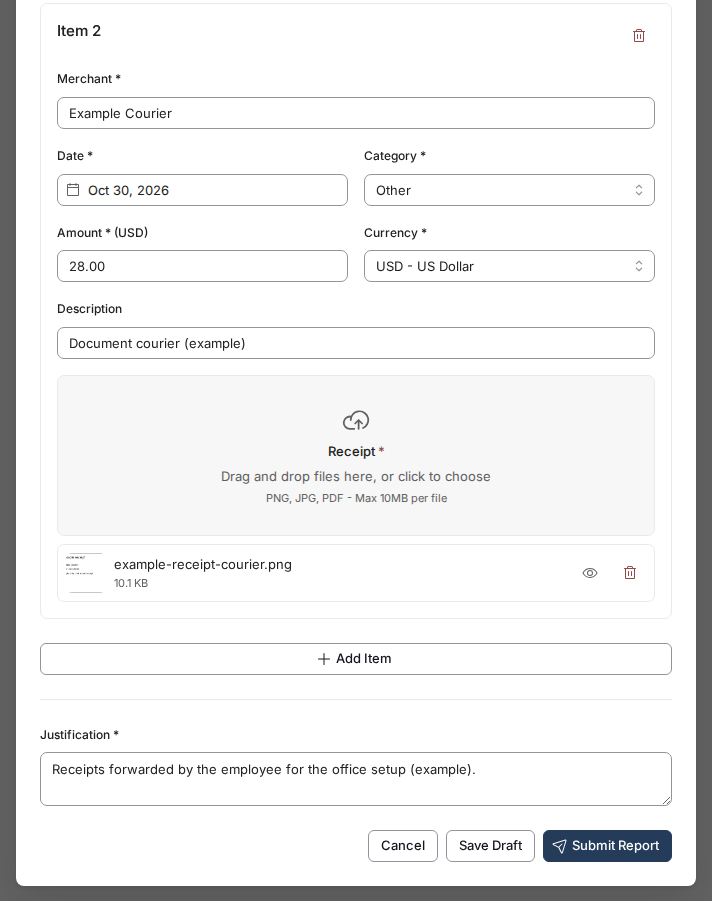
- Complete the Justification if your organization requires one, then click Submit Report. The report appears in this list under the employee's name and follows your normal approval rules. Save Draft instead saves it to the employee as a draft, and drafts are not shown in this list, so only the employee can finish and submit it.
Good to know
- The approval date (timestamp when you approve) determines the employee's payout date, not when they submitted it.
- Approving early in the month (1st - 15th) ensures payment by end of that month; approving after the 15th delays payout to the 15th of next month.
- Review expenses at least once per week to keep your team on track for the next payout window.
- If an employee paid in a different currency from the one they are reimbursed in, the View details window shows the amount they spent, in the currency they spent it in - not the converted amount you are approving. The employee's own copy of the report shows both figures. If you need the converted figure before approving, ask them for it or use the expense export, which carries both.
- There is no CSV upload for expenses today. Each report is entered in the Expense Report window (its Choose your receipts area adds one line item per receipt you drop in), and one report can hold as many line items as you need, so several expenses go in together.
⚠️ Payment timing depends on your approval action. If an employee needs urgent reimbursement, approve early in the month.
Still stuck?
You can email customer-success@toku.com to reach our support team. Please include your email address, organization name, and a description of what happened. Screenshots and videos are always welcome to speed up the troubleshooting process. Feel free to reach out any time for further assistance.