
 3 MIN READ
 UPDATED NOV 5, 2026
For existing users of Toku HR. Last updated November 5, 2026.
Create a Polygon-powered Toku Wallet from Payment Methods, without repeating your account setup. This walkthrough follows the HR experience from an existing account, through wallet creation, to the wallet management screen.
Before you start
- Sign in to your existing Toku account and open the Employment product.
- Have access to the email you want linked to your wallet. If Toku asks for two-factor authentication, also have your authenticator app available.
1. Open Payment Methods
Click Payment Methods under Finance in the left menu. Stay on Wallets & Banks. This is the usual starting point for someone whose Toku account already exists.
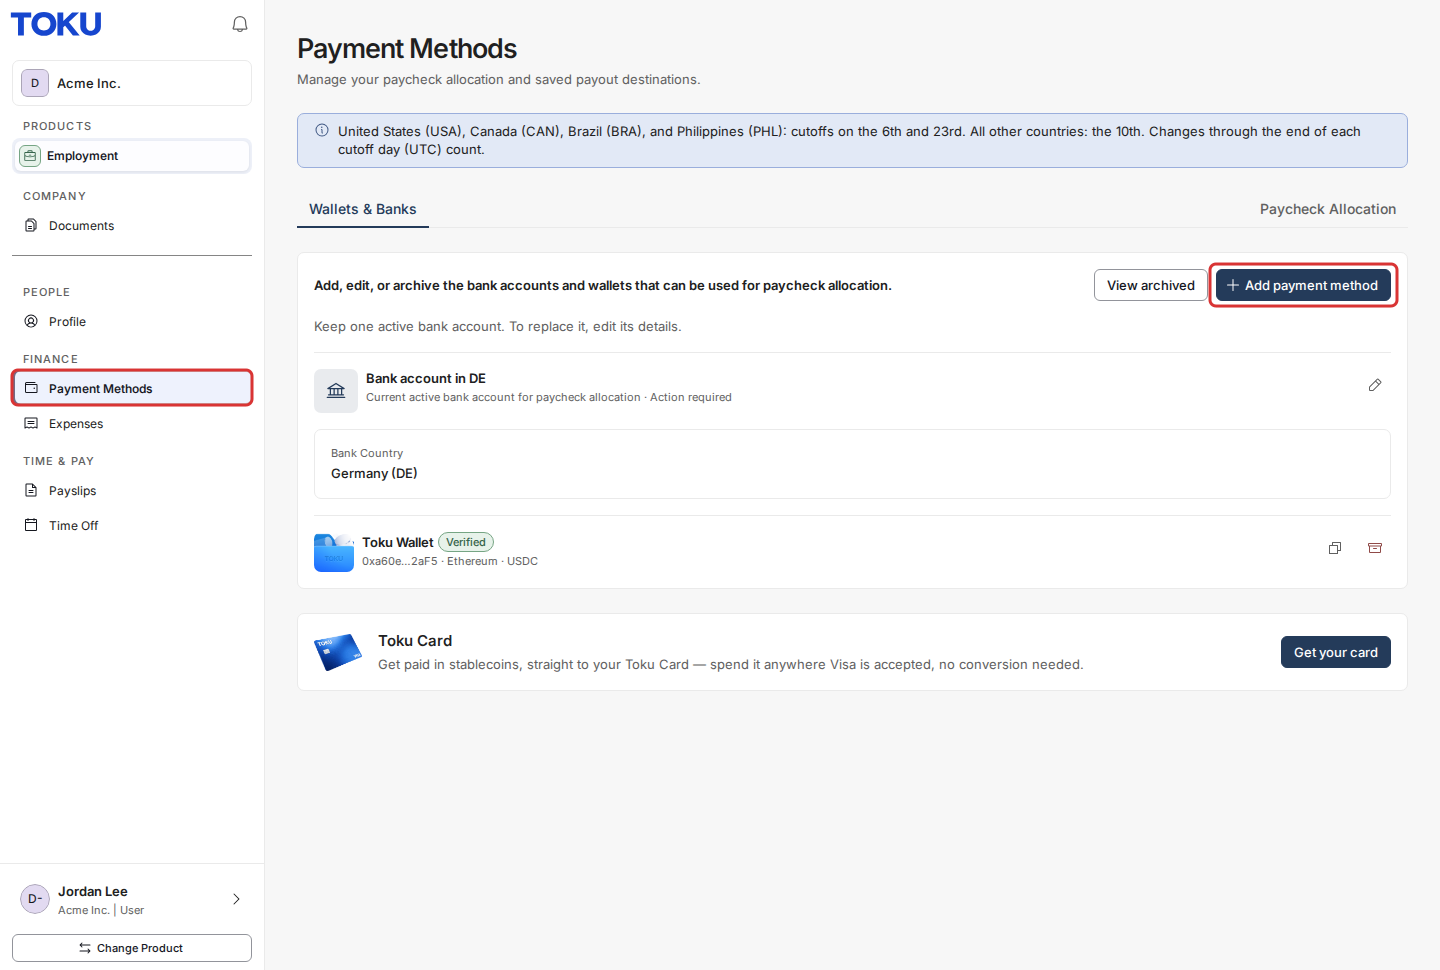
2. Add a payment method and choose Polygon
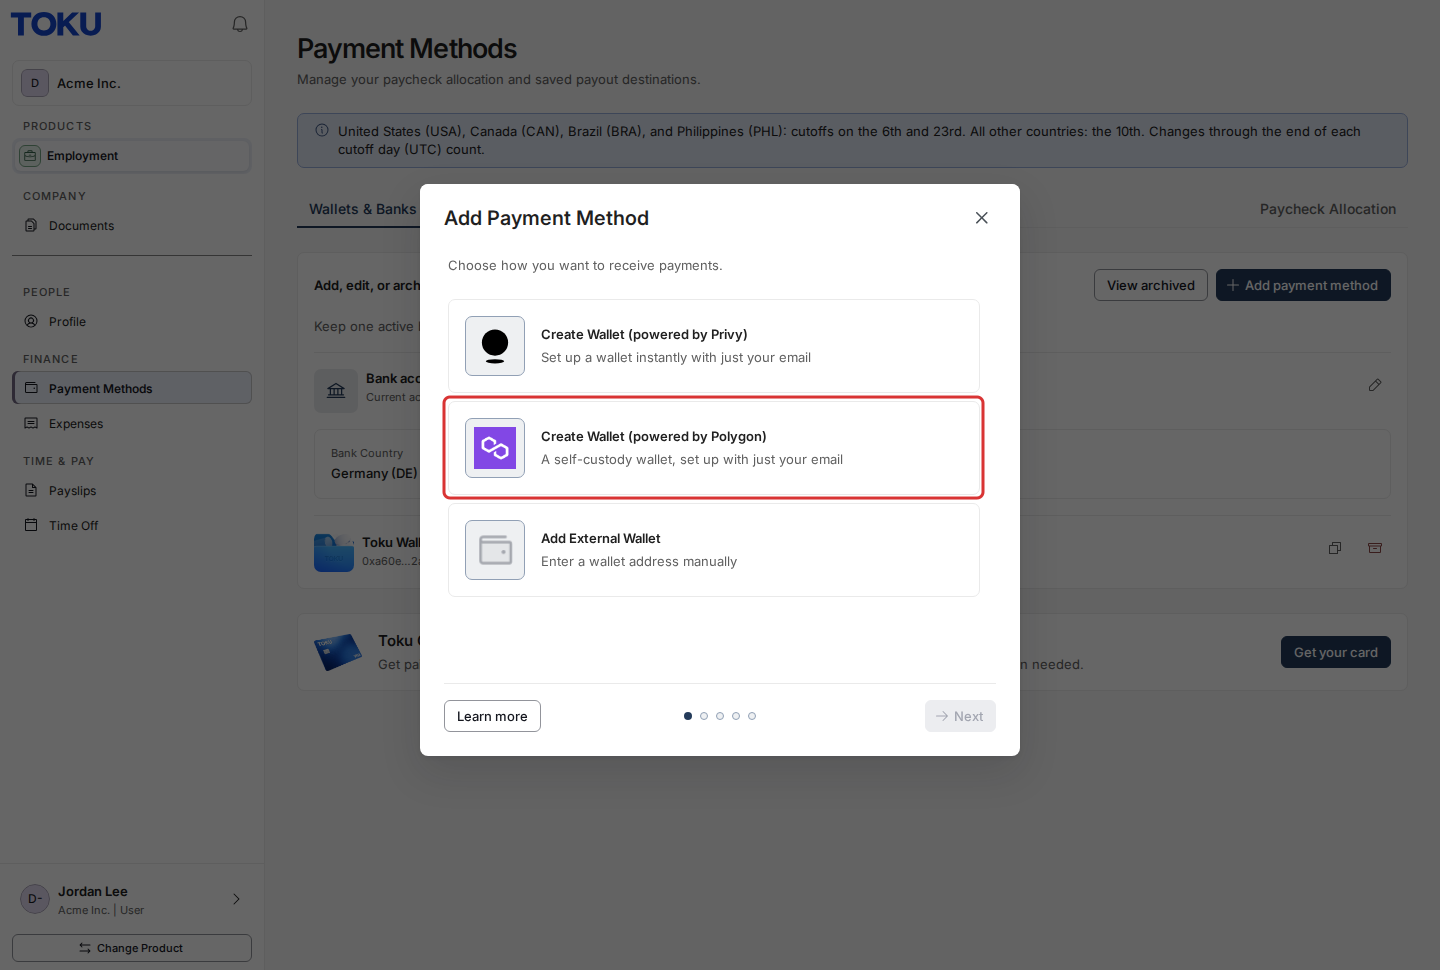
Click Add payment method. In the Add Payment Method window, select Create Wallet (powered by Polygon), then click Next. The Privy and external-wallet choices can also appear, depending on your organization's settings.
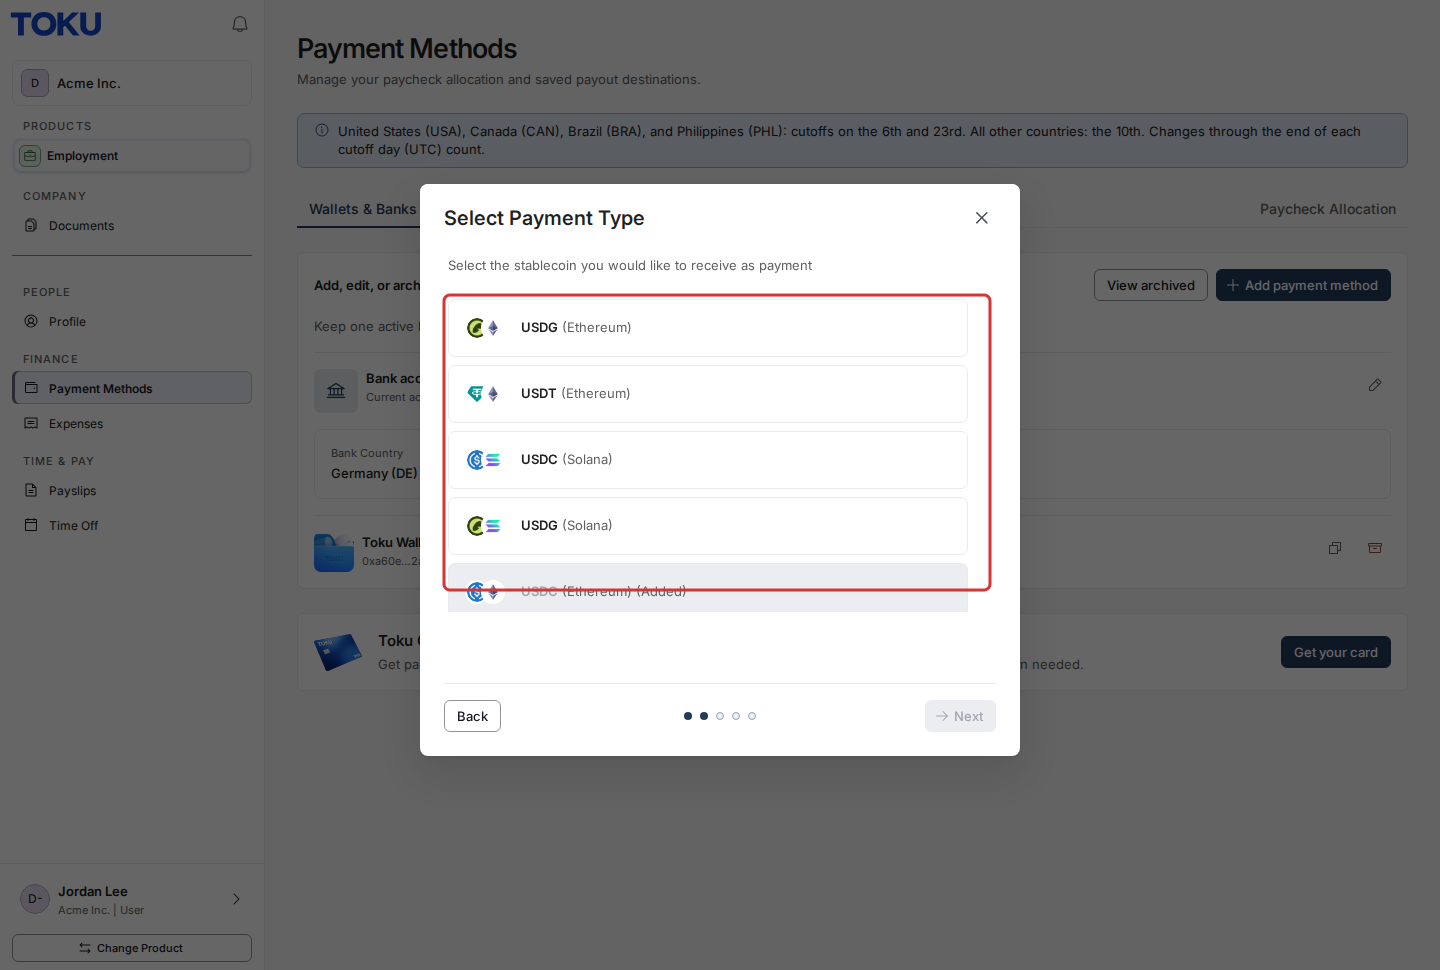
3. Choose the stablecoin and network
On Select Payment Type, choose the token and network you want to receive. This example uses USDT (Ethereum). The network appears beneath the token name, so check both before continuing. Options marked Added are already saved to your account.
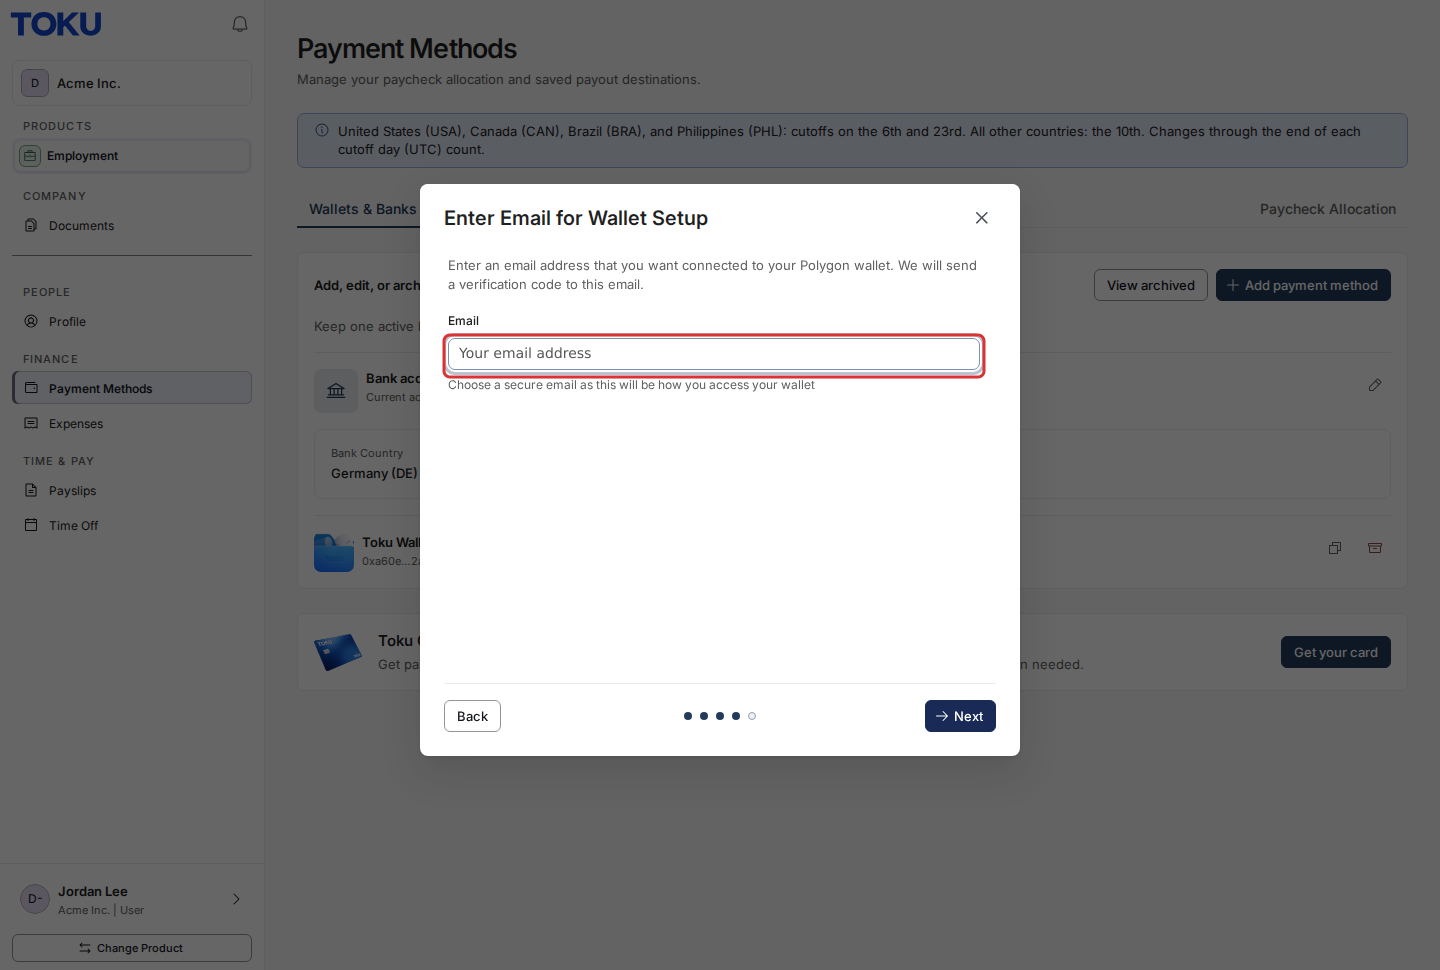
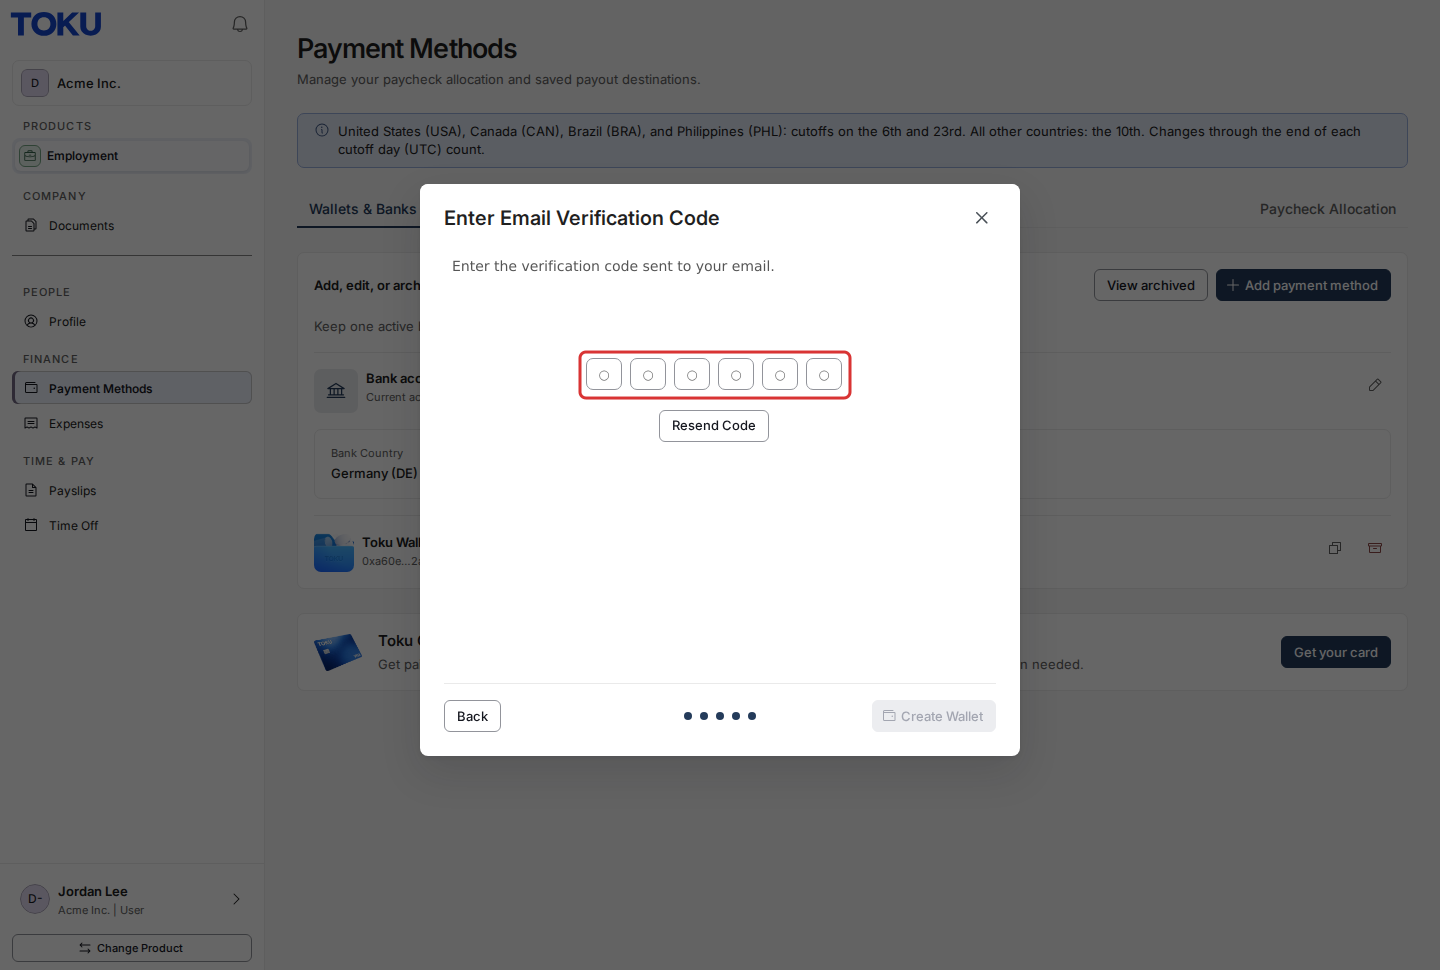
4. Verify your email
Enter the email address you want connected to your Polygon wallet and click Next. Enter the code sent to that inbox. Use Resend Code if needed. This email is how you access the wallet, so use an inbox you control.
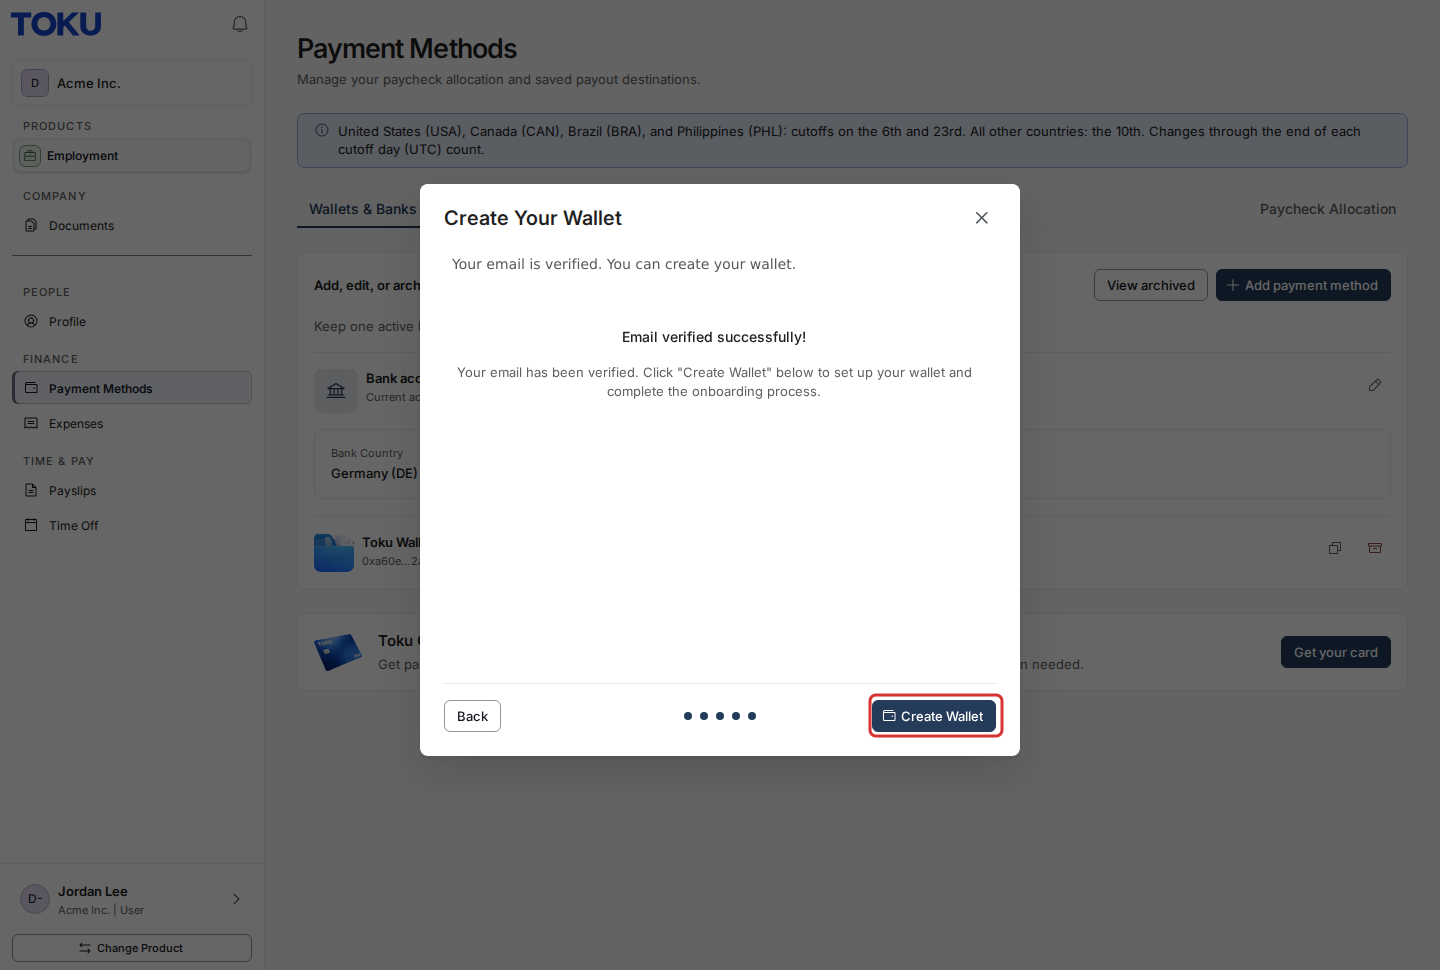
5. Create the wallet
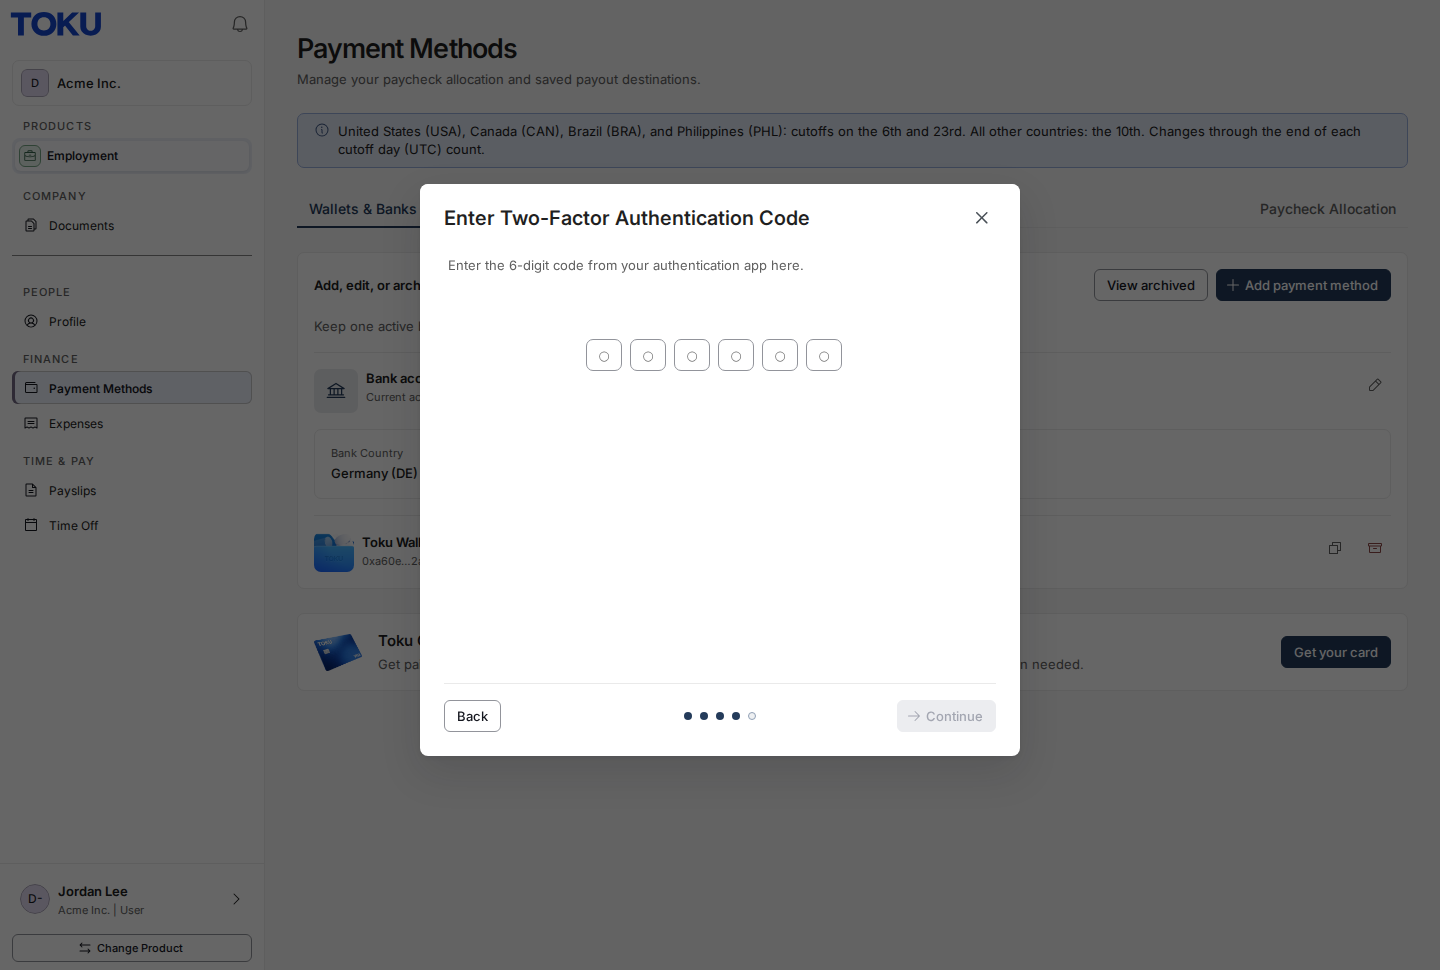
After the email is verified, click Create Wallet. If the organization requires two-factor authentication, enter the current code from your authenticator app and click Continue.
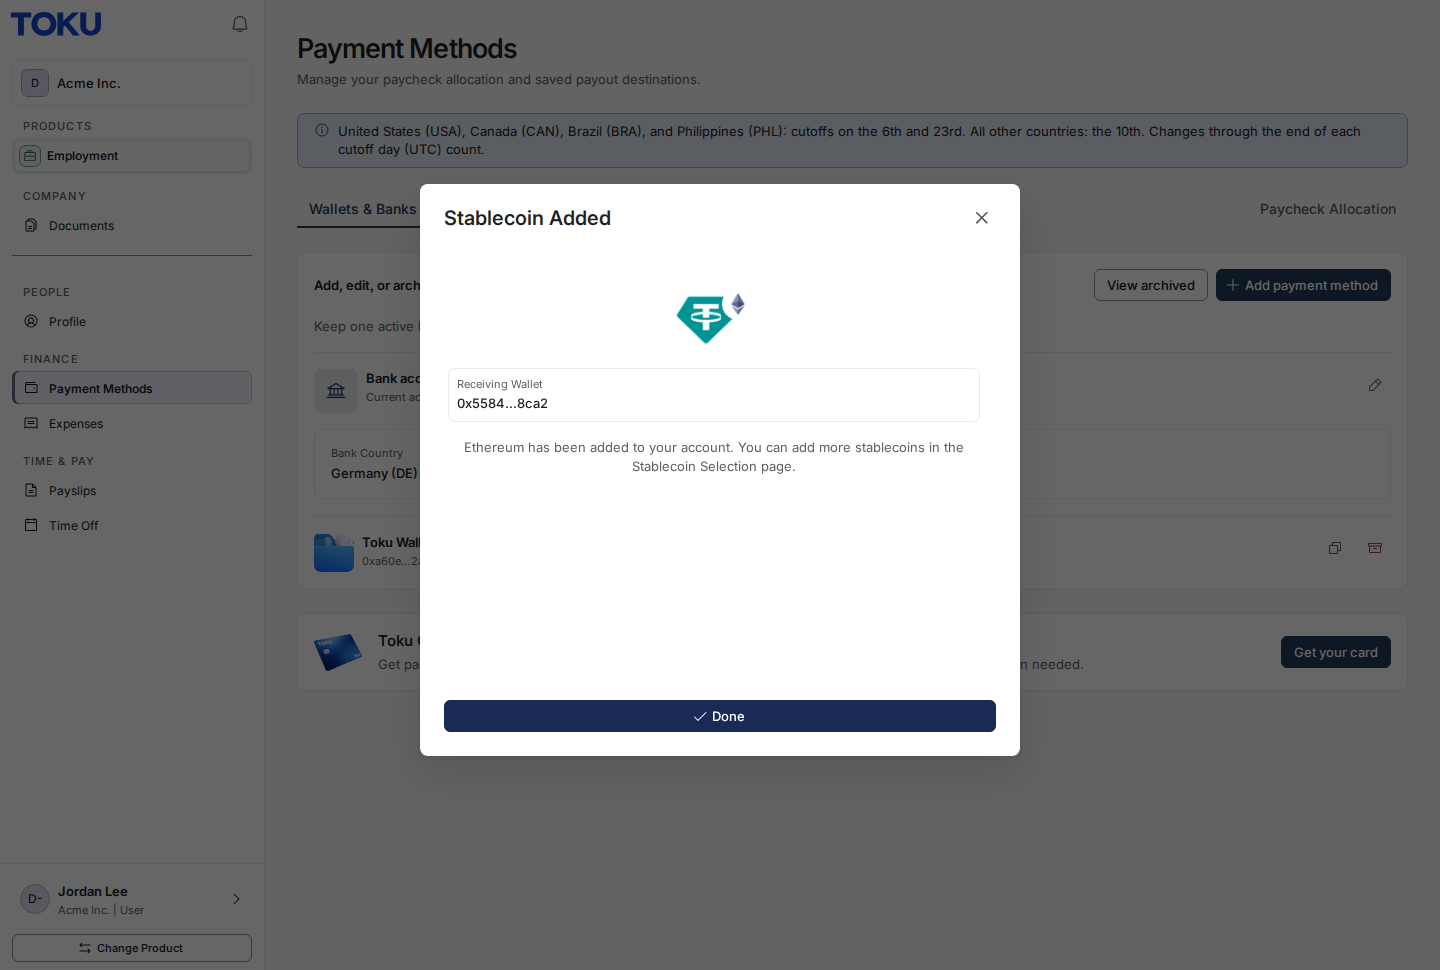
6. Find the new wallet
When Stablecoin Added appears, click Done to return to Payment Methods > Wallets & Banks. Find the new Toku Wallet row by its token and network. The Toku Wallet name is a clickable link, highlighted below.
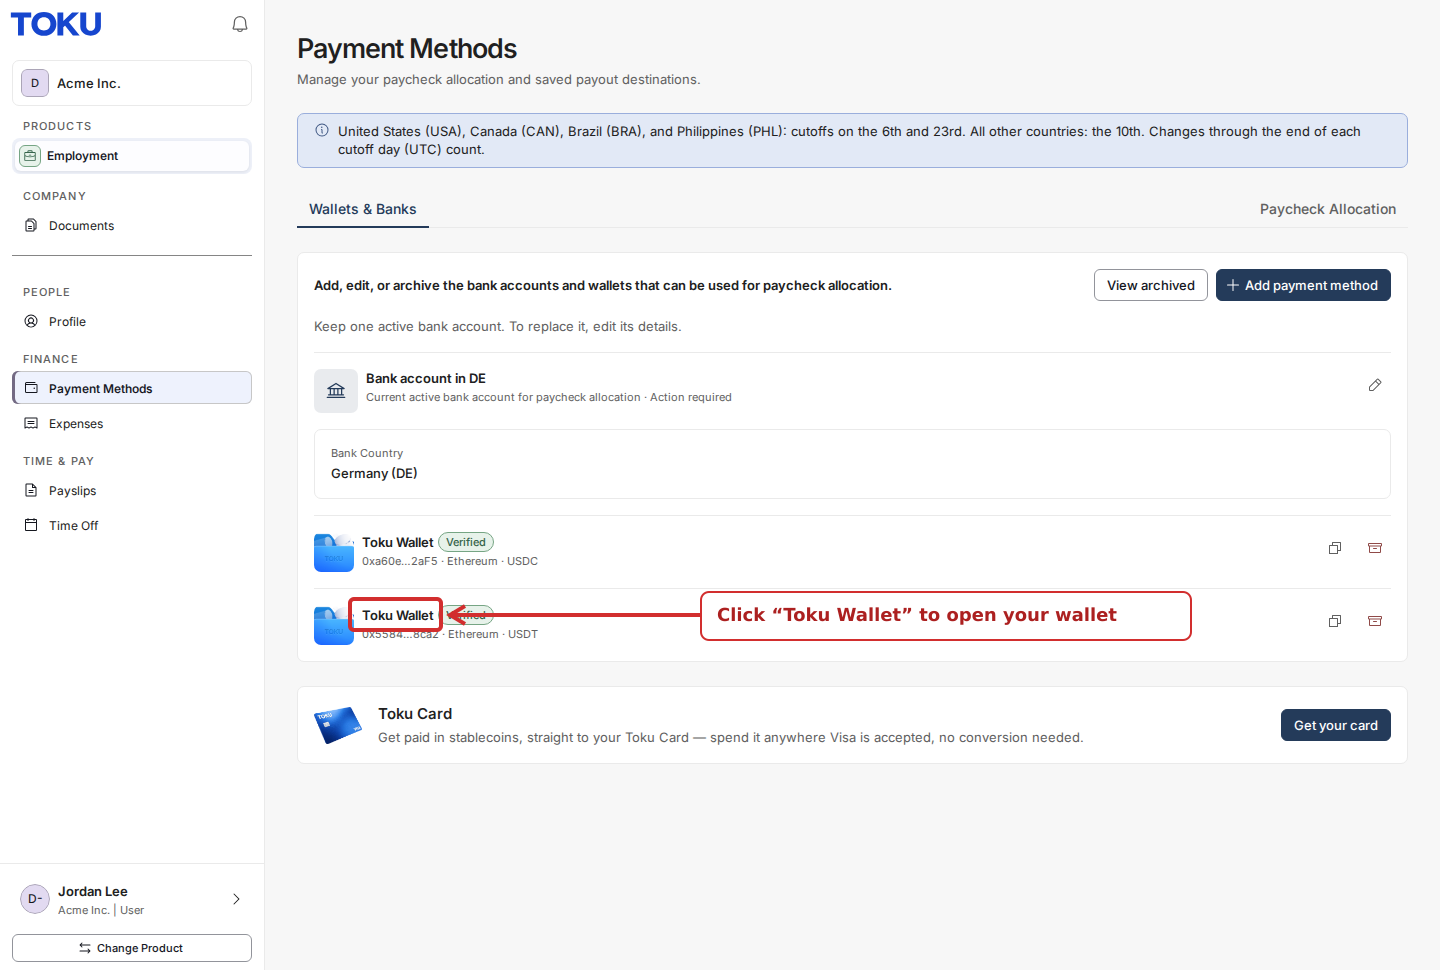
7. Click the Toku Wallet name in Payment Methods
Click Toku Wallet on the new wallet row shown by the red box and arrow above. This opens the wallet management page shown below; you do not need a Toku Wallet tab in the left menu. Here you can see balances and current holdings. Receive shows the wallet address, and Send begins a transfer. This walkthrough verifies creation and display with an empty wallet; a funded transfer is a separate test.
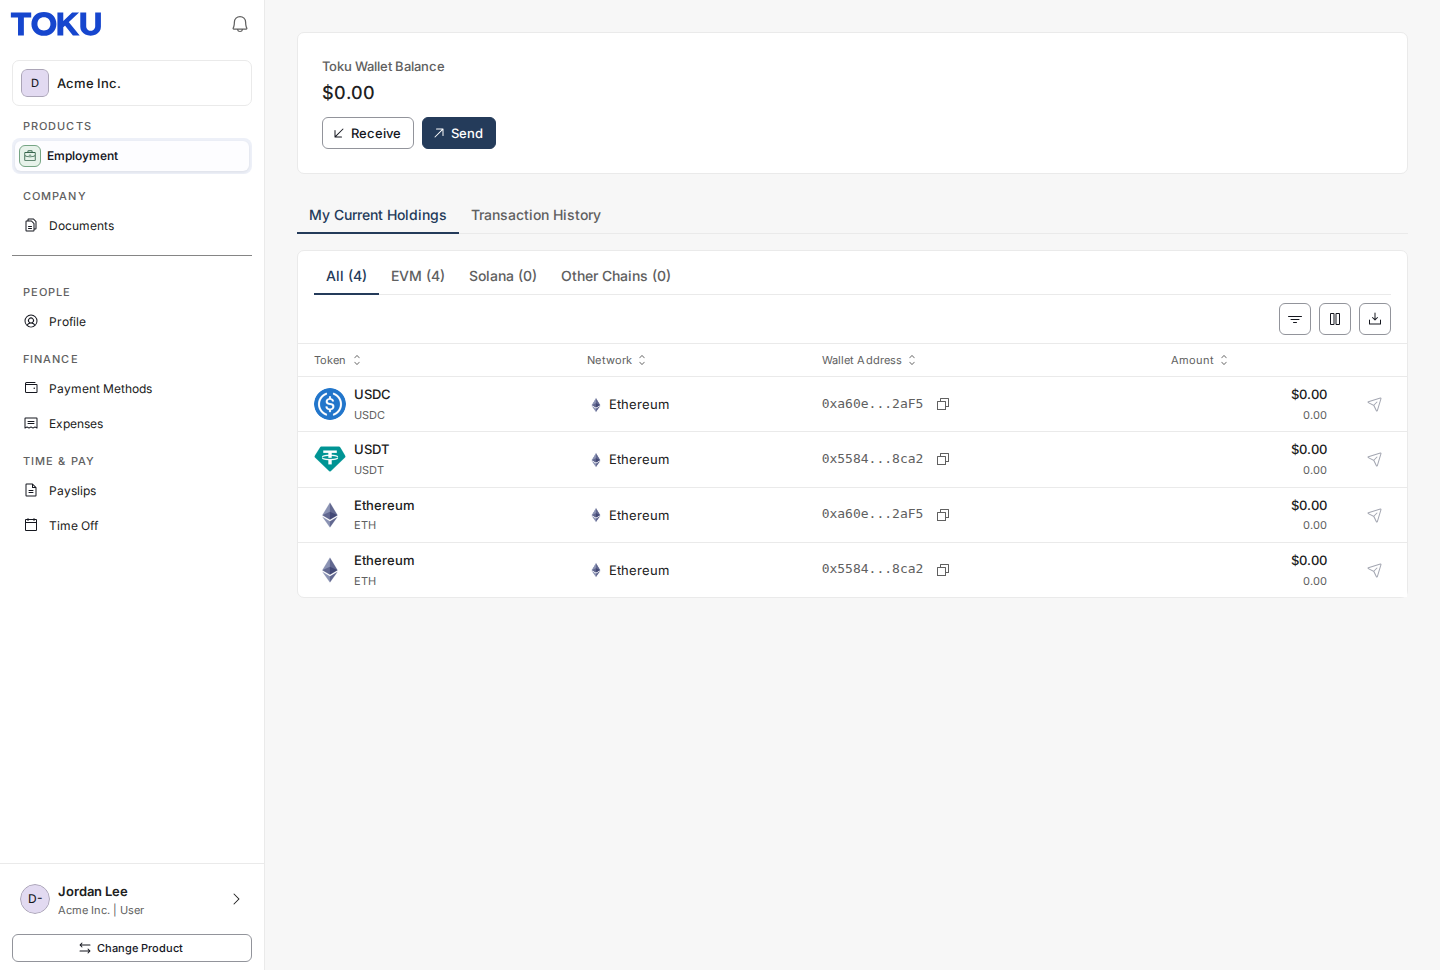
Sandbox validation and next steps
The HR workflow shown here uses Polygon sandbox credentials. The account's existing Privy wallet remains in place alongside the Polygon wallet.
All of this works with sandbox credentials. Once our account is live we can swap the key in for production API keys and turn it on for the Polygon account to begin creating wallets using their own message.
The next step is for Polygon to make the project live so a production publishable key can be generated. After the key is configured, enable the Polygon wallet option for the intended organization and verify the live workflow. The screenshots above do not establish funded mainnet transfers or production-key availability.
Still stuck?
Contact customer-success@toku.com if the Polygon choice is missing or you cannot finish wallet creation.