
 1 MIN READ
 UPDATED OCT 30, 2026
Step-by-step walkthrough for adding grant recipients to your organization.
Add recipients to your organization before creating grants. This guide walks through the process from the TGA dashboard.
Step 1: Open People Directory
In the left sidebar, click People Directory. You’ll see a list of all users currently in your organization.
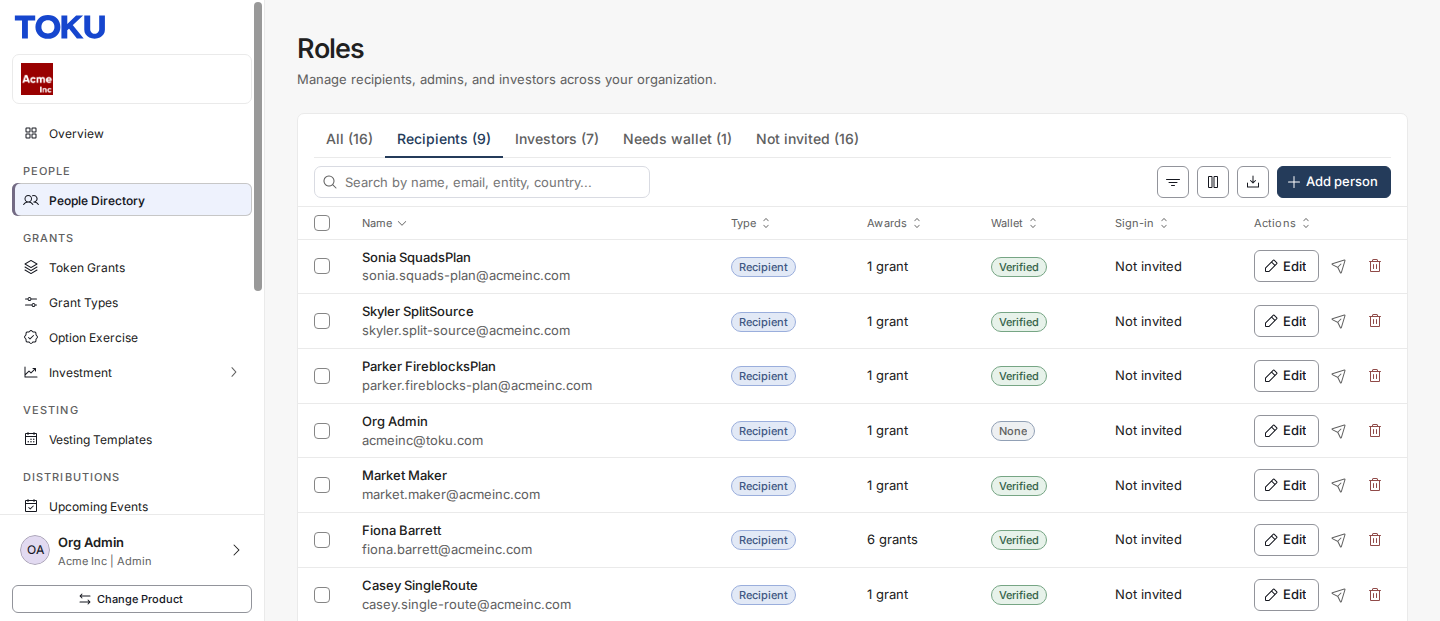
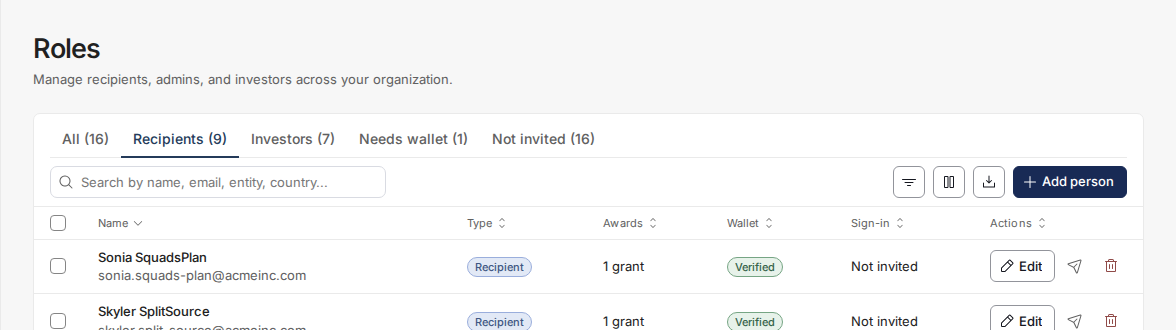
Step 2: Click Add person
Click the Add person button in the top-right of the page.
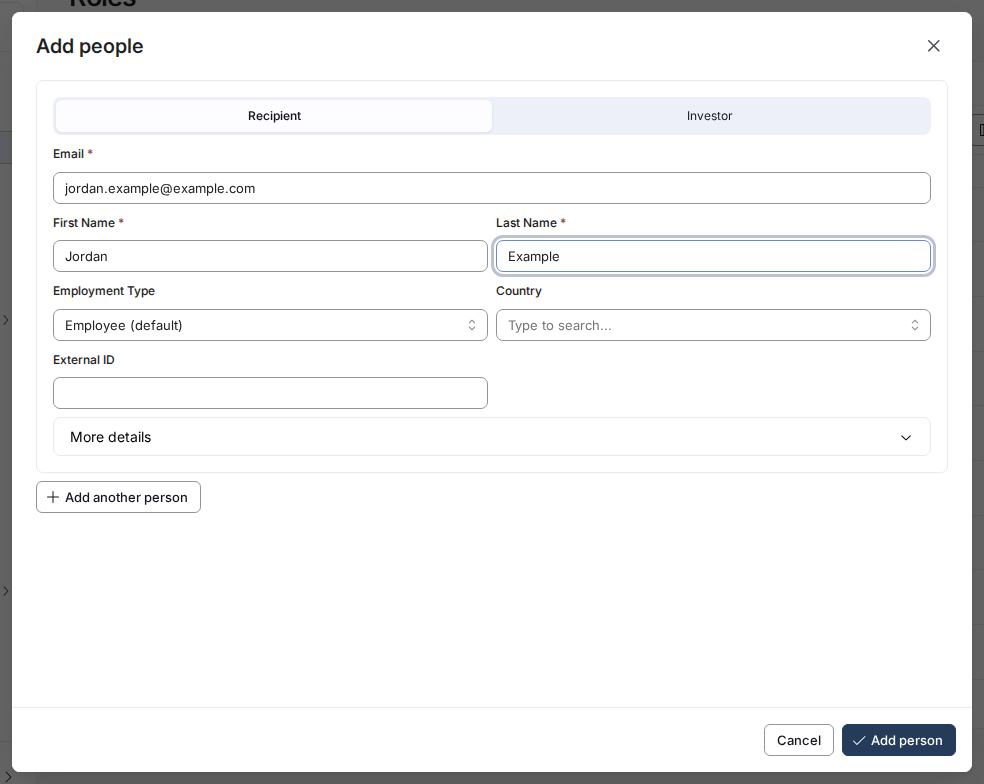
Step 3: Fill in the user form
Enter the recipient’s details in the form:
- Email — Must be unique in your organization
- First Name and Last Name
Step 4: Save and confirm
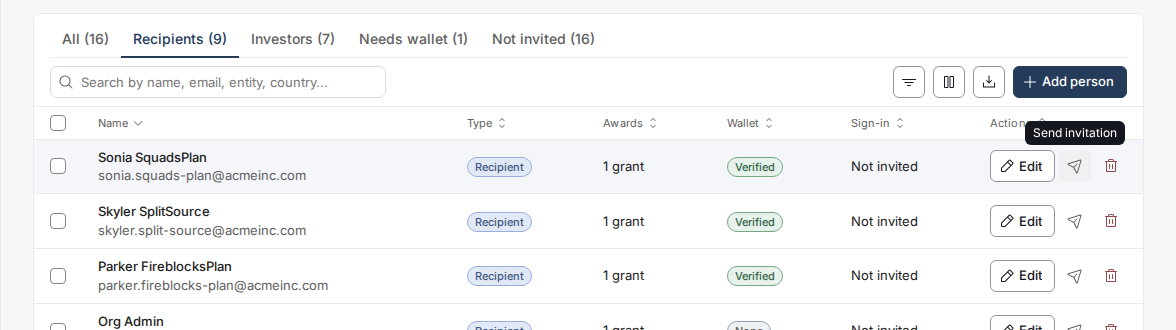
Click Add person. Adding a person doesn't send an invitation: when you're ready, click the Send invitation icon in their row to email them their invitation.
💡 Tip: To add many users at once, use Bulk Upload Grants — the bulk upload flow also supports uploading recipients from a CSV template.
User Roles
| Role | Description |
|---|---|
RECIPIENT |
Grant recipient - can view grants, manage wallet, see vesting schedule |
CLIENT_ORG_ADMIN |
Full access to all admin features |
PAYROLL_ADMIN |
Access to payroll and settlement |
FINANCE_ADMIN |
Access to reports and payments |