
 4 MIN READ
 UPDATED OCT 30, 2026
📘 For employees and contractors managing their own payout wallet in Toku. Last verified October 30, 2026.
Use Payment Methods to add a payout wallet, compare the full saved address, replace a same-token/network wallet in the supported order, complete verification, and copy the saved address.
Before you start
- Have the full wallet address ready and confirm that it supports the token and network shown by Toku.
- Use the wallet owner's login. The wallet owner enters and verifies the payout address.
- For the same token and network, use Archive only when the old wallet is Verified. If its status is Pending or Action needed, select Cancel Request instead. Then add the intended address and complete verification; until the replacement is Verified, there is no verified wallet for that pair.
Add or replace a payout wallet
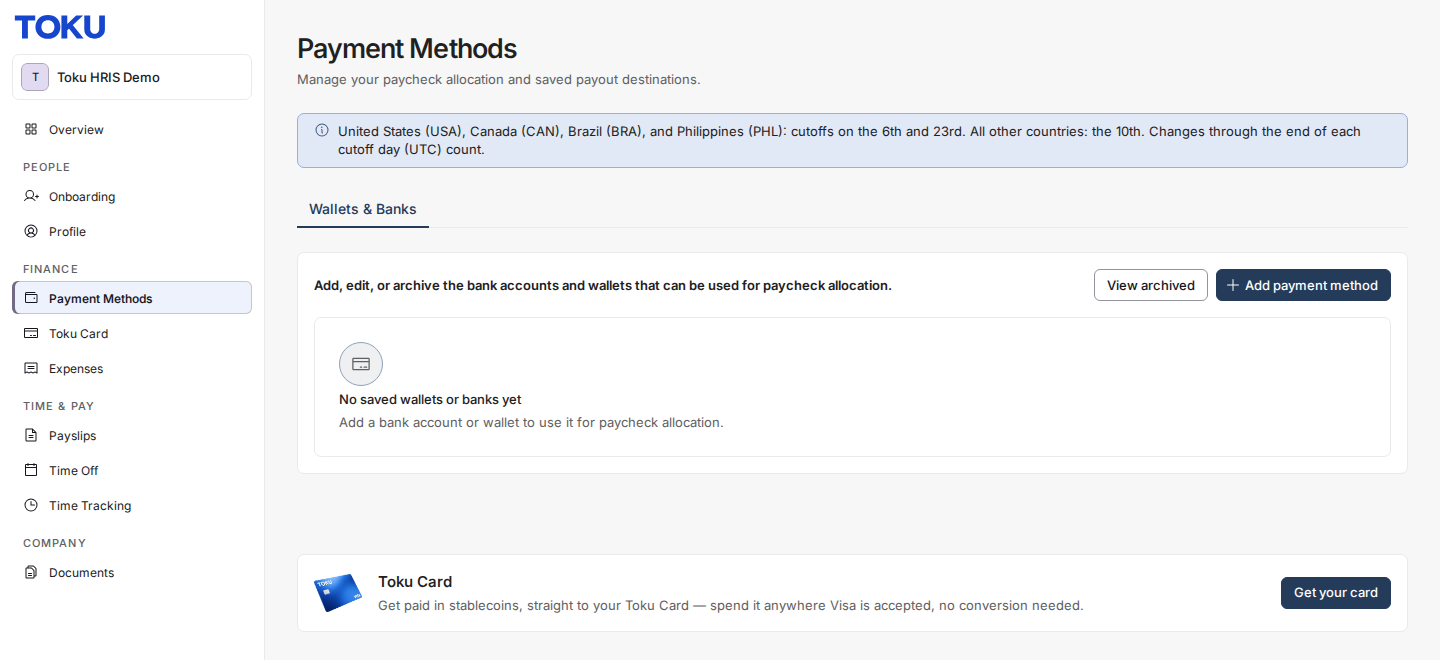
- Open Payment Methods. Choose Wallets & Banks (or Wallets), then select Add payment method.
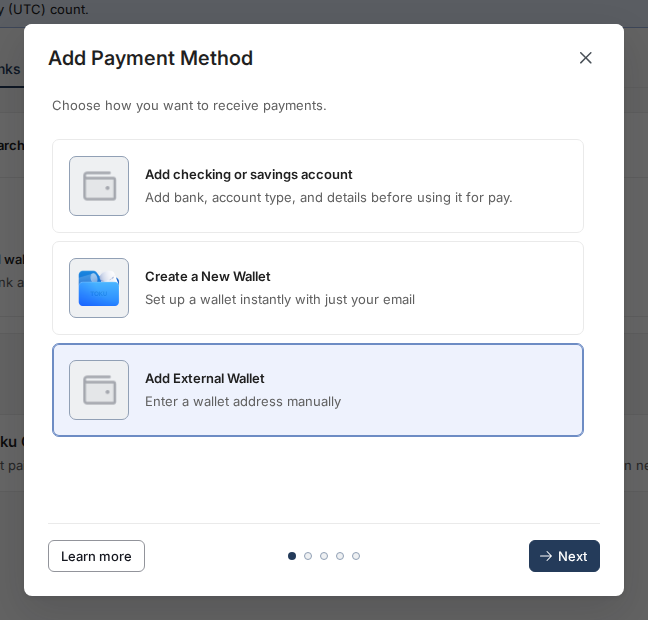
- Select Add External Wallet, then select Next.
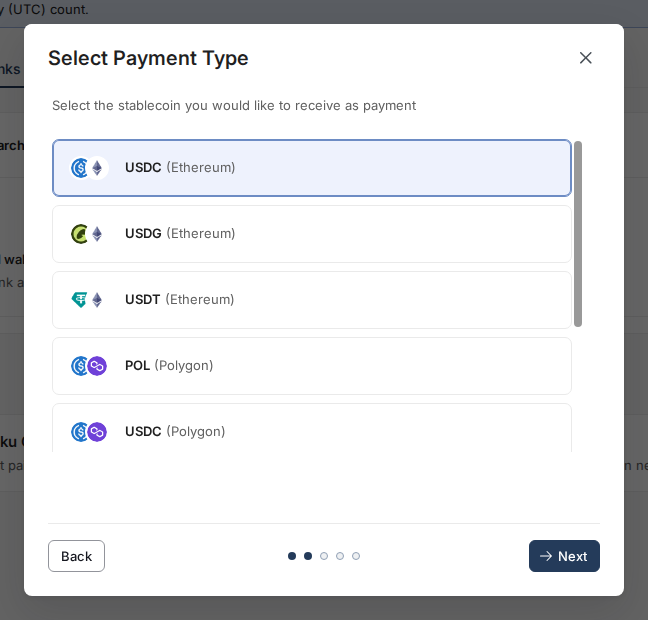
- Select the token and network shown for your organization, then select Next. The available combinations depend on your payout configuration.
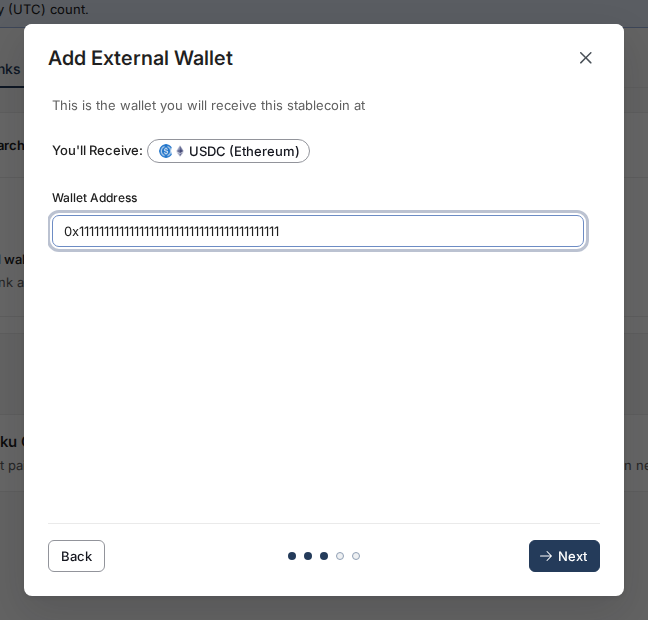
- Enter the full wallet address exactly as it appears in your wallet, recheck the network, then select Next.
- Wait for the new entry to appear. Pending means the test transaction or verification is not finished; Verified means verification is complete.

- Use Copy wallet address (the copy icon on the wallet row, or in the wallet actions menu) to compare the full saved value with the intended address. Pending requests also show the actions available for that state.

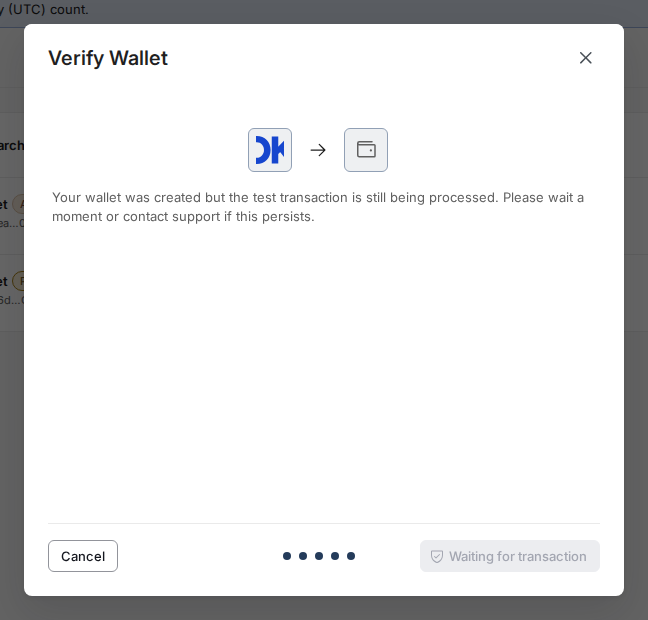
- If Verify is available on the wallet, select it to open Verify Wallet. Wait for the test transaction, confirm it in your wallet or through the blockchain link, then complete verification.
💡 The July 2026 TGA code release includes the wallet-write fix. If the intended address is not shown in Payment Methods, compare the full saved address before deciding whether the wallet needs replacement.
Recover a wallet update that did not save
- Refresh Payment Methods and copy the saved wallet address. If it matches the intended address, do not create a duplicate.
- If the copied address does not match and a wallet already uses the same token and network, use the action for its status: Archive for Verified, or Cancel Request for Pending or Action needed. Then add the intended address and complete verification; a token/network conflict by itself does not confirm which address is saved.
- If the new wallet is Pending, reopen its actions. Complete Verify Wallet when available; if Retry Test Transaction appears after a failed attempt, use it and then reopen verification.
Good to know
- Wallet addresses are not changed in place. For the same token and network, use Archive only when the old wallet is Verified; for Pending or Action needed, select Cancel Request. Then add the intended address and complete verification.
- Archiving a Verified wallet removes its existing allocation. After the replacement reaches Verified, open Paycheck Allocation, select Edit paycheck allocation, assign the intended fixed-dollar amount to the replacement, and select Save. Confirm the displayed amount before the next payout.
- Available tokens and networks vary by organization. Use only a combination shown in the add-wallet flow.
- Wallet tables shorten addresses for display. Copy wallet address returns the full value for comparison.
What each status means
Pending means creation or the test transaction is still in progress. Action needed means you can open Verify Wallet to complete verification. Verified means the wallet passed verification. A failed test transaction can show Retry Test Transaction among the wallet's actions. On the ordinary contractor wallet page, this action-needed state may appear as PENDING_TXN_APPROVAL.
Confirm the update
Before the next payout, compare the copied address and network with the intended destination. Archiving a Verified wallet removes its allocation, so after the replacement reaches Verified, open Paycheck Allocation, select Edit paycheck allocation, assign the intended fixed-dollar amount to the replacement, select Save, and confirm the displayed amount.