
 12 MIN READ
 UPDATED OCT 30, 2026
⚠️ Contractor invoice and payment deadlines: late action means late payment
- Contractors: submit invoices by the 19th of each month. A saved draft is not a submitted invoice.
- Admins: approve invoices by the 21st of each month. Submission alone does not authorize payment.
- Funding: Toku must receive cleared funds 4 - 5 business days before payout. Initiating a transfer or sending proof of payment does not meet the deadline.
- Standard monthly payout: the last day of the month, provided submission, approval, and funding deadlines are met. Late submission, approval, or funding will delay payment. Every day of delay pushes payment back by at least one day. A missed payment cycle can cause a longer delay; the invoice due date is not a guarantee of payment.
Automation does not remove these deadlines. Earlier published holiday deadlines take precedence; see Toku: 2026 End-of-Year Payroll & Payment Guide.
📘 Audience: contractors · Customer-facing · Last verified October 30, 2026 (screenshots updated for the new design). Draft deletion step re-verified September 2, 2026 against the code live in production.
Who this is for and what you'll accomplish
This guide is for contractors who bill their client organization through Toku. By the end, you will know how to create an invoice, save and edit drafts, submit an invoice for approval, fix mistakes, and follow your invoice all the way to payment. No prior experience with Toku is needed.
Before you start
- Sign-in page:
app.toku.com— you need the email address and password you set up when you accepted your Toku invitation. The oldtga.app.toku.comaddress is no longer the way in. - Role required: contractor. You must have accepted your organization's invitation and completed onboarding.
- Payment details first: add your bank account or wallet under Payment Methods (in the left menu) before creating your first invoice. Without payment details the form shows "Add bank information or an active wallet before submitting an invoice." and will not accept the invoice - not even as a draft.
- Your contract: keep it handy so you can bill in the currency and amounts it specifies.
When to create an invoice yourself
Some organizations use automatic invoicing: Toku creates your monthly invoice from your contract, and you do not need to do anything. Other organizations expect you to submit an invoice yourself each billing period. Create an invoice manually when:
- your invoices do not appear automatically each month;
- you need to bill for extra work outside your normal contract;
- you need to request a reimbursement for an expense you paid (receipt required);
- an automatic invoice was rejected or had the wrong amount, and you need to submit a corrected one. Not sure whether automatic invoicing is on for you? Ask your organization's administrator, or simply check whether invoices already appear on your Invoices page at the start of each month.
Create and submit an invoice
Step 1. Open app.toku.com in your browser. The screen says Welcome back and asks only for your email address - there are no product tabs to pick from, and no password box yet. Type your email address and click the black Continue button. If your work email is a Google account, you can click Sign in with Google instead. Success looks like: the screen changes to ask for your password.
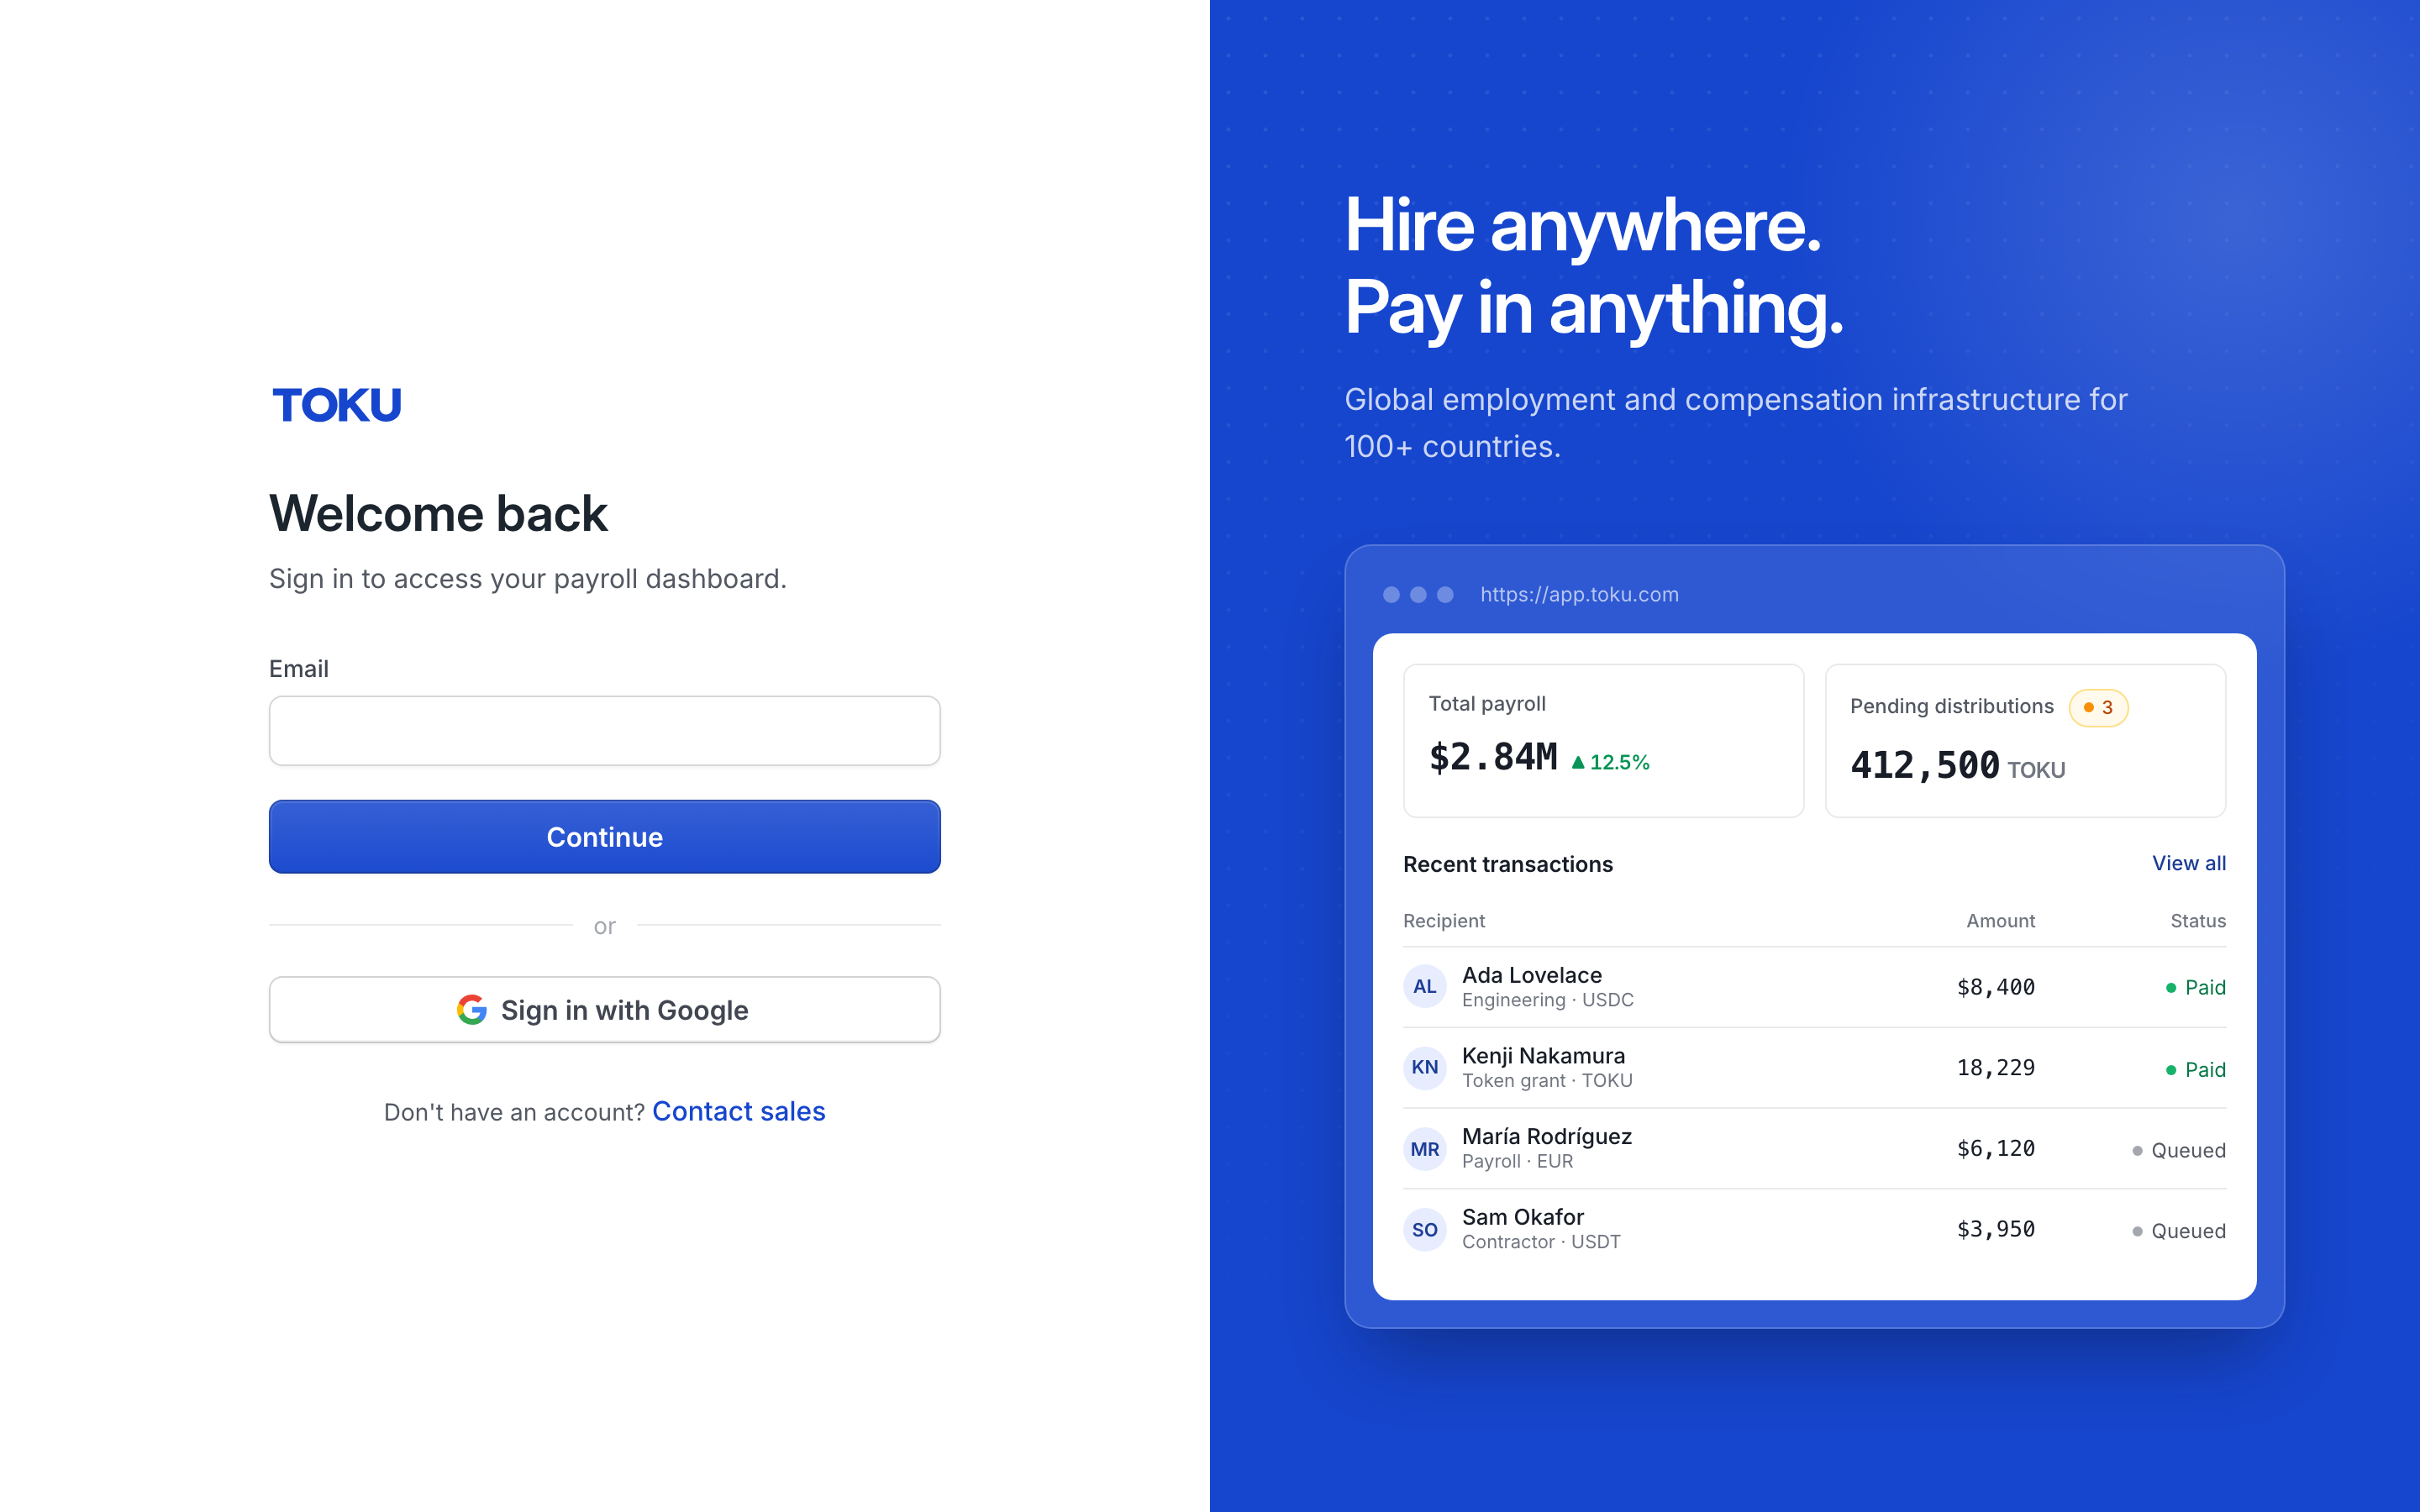
Enter your email on the Welcome back screen and click Continue.
Step 2. Type your password and click Sign in. Prefer not to use a password? Click "Sign in with email", then "Send sign-in link", and open the link Toku sends you - it works once and expires after an hour. If an error mentions your password, click "Forgot password?", enter your email, and click Send reset link. Success looks like: the screen changes to your dashboard, or to the organization picker below, within a few seconds.
If you work with more than one organization on Toku, an organization picker appears next. Click the row for the organization you want to invoice, then click Continue as User. If you belong to only one organization this screen may not appear - you land directly on your dashboard, which is fine; continue to the next step.
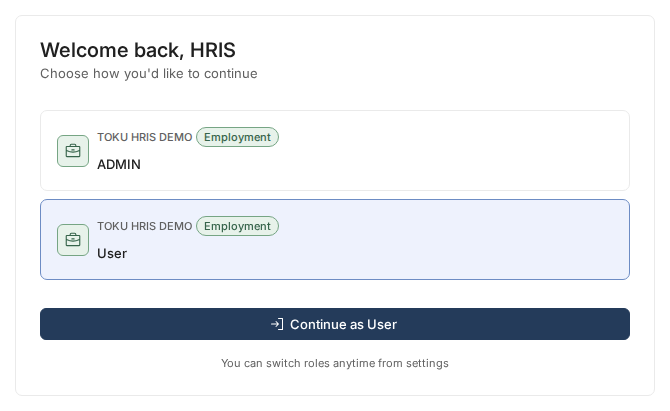
Click the row you want (here the User role), then click Continue as User.
Step 3. In the left menu, click Invoices. The page shows three counters (Scheduled, Submitted, Drafts) and an invoices table with tabs (All, Approved, Draft, Pending Review, Rejected). Click the New invoice button at the top right of the table. Success looks like: a window titled "New Invoice" opens on top of the page. If the table says "No invoices yet", that is normal on a first visit - click the Create invoice button in the middle instead.
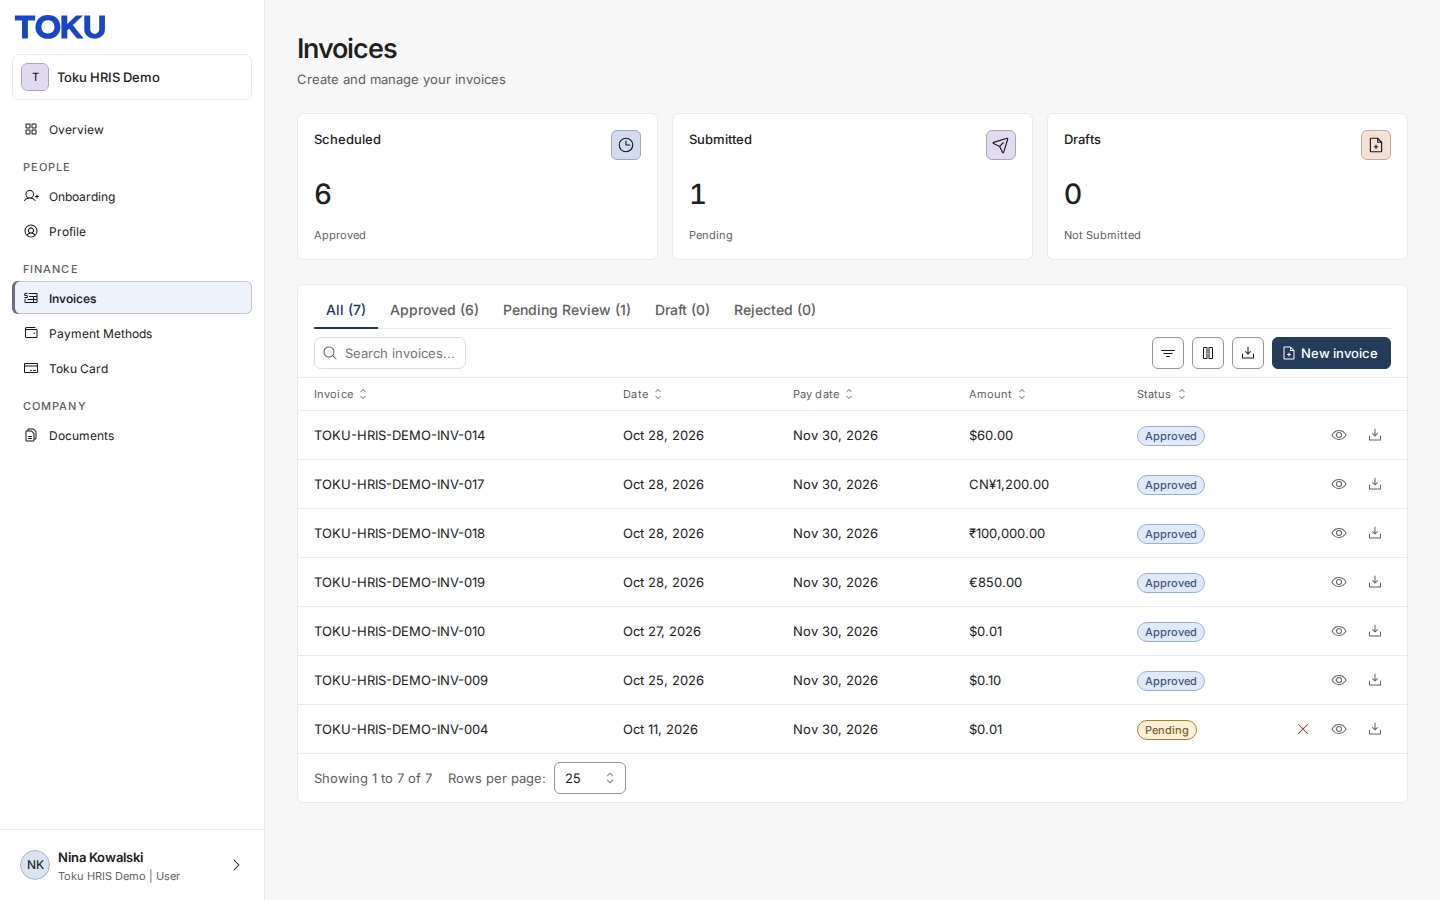
On the Invoices page, click New invoice at the top right of the invoices table.
Step 4. At the top of the New Invoice window, choose the Invoice Type: Service for regular work under your contract, or Reimbursement for expenses you paid and want back (a receipt attachment is required for those). For a Service invoice, click Month of Service and pick the month the work covers - you cannot submit a service invoice without it; the form will say "Month of service is required."
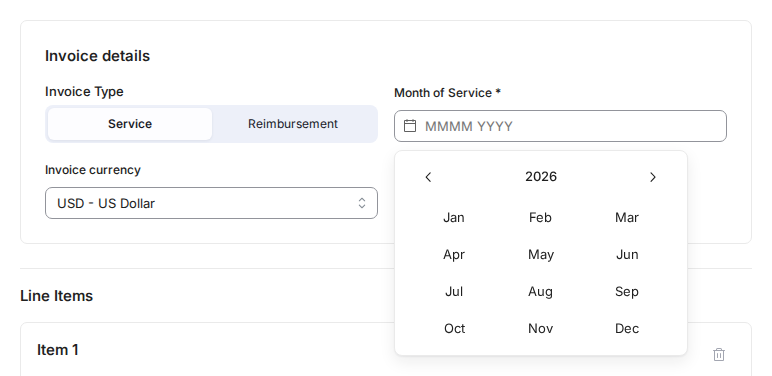
Choose Service or Reimbursement, then pick the Month of Service.
Step 5. Click the Invoice currency dropdown and pick the currency named in your contract. Toku supports more than 160 currencies, including the digital dollars USDC and USDT. If you do not see this dropdown at all, your organization bills in US dollars only. Important: if your contract's currency is missing from the list, do not submit in US dollars instead - contact support first (see "Still stuck?" below) so the currency can be added.
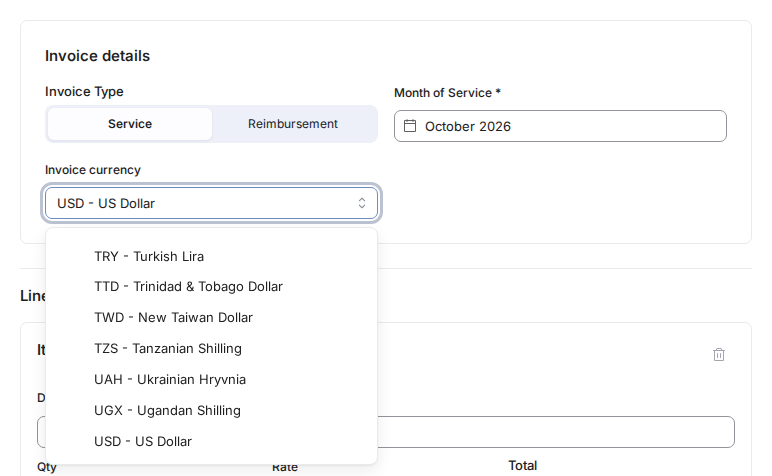
Pick the currency from your contract in the Invoice currency dropdown.
Step 6. There is no due date to set - the form does not ask for one, and you cannot change it. Toku sets the due date for you, from the monthly submission deadline. Submit on or before the 19th of the month and the invoice is due on the last day of that same month. Submit from the 20th onwards and it moves to the last day of the next month. A draft you have not submitted has no due date and shows a dash in the Pay date column on your Invoices page; the date is worked out at the moment you submit, so finishing an old draft dates it from that day. The date is worked out in UTC, so it does not shift with your own time zone.
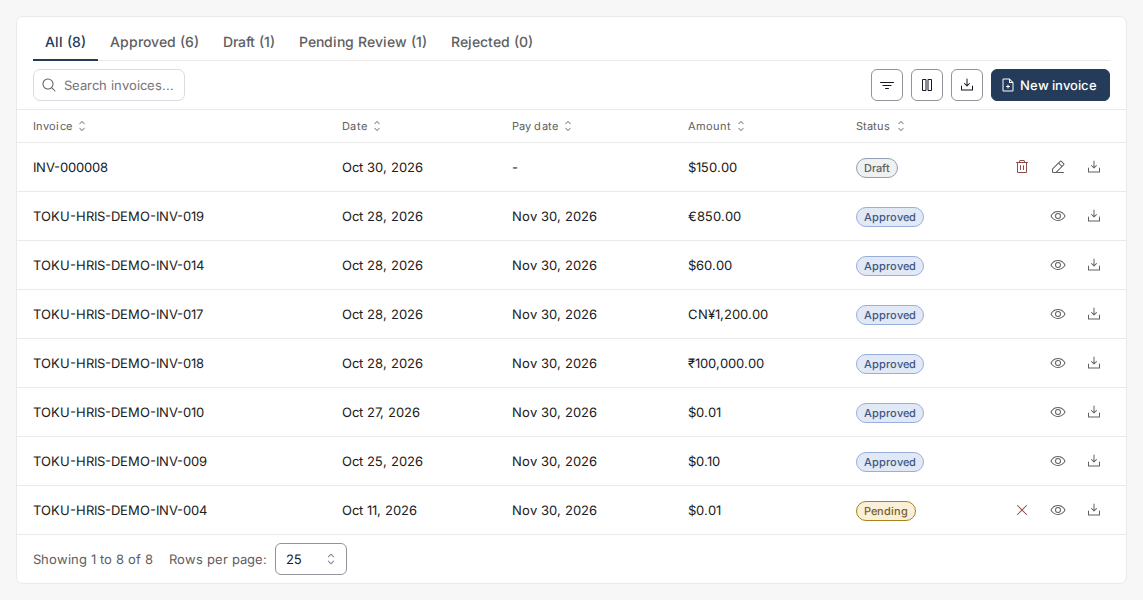
Your Invoices page. The draft shows a dash under Pay date; submitted invoices show the date they are due to be paid.
Step 7. Under Line Items, describe your work. Type what you did in Description, how many units in Qty (a whole number, at least 1), and your price per unit in Rate (greater than 0). The Total on the right updates by itself, and the Summary at the top shows the running grand total. Click Add Item for additional lines. Each line also has a Category and a Payment Method - if you added only one payment method, it is selected for you automatically.
Step 8. To attach files - your own PDF invoice, a timesheet, or a receipt - drag them into the Attachments box or click the box to browse. Accepted files: PDF, images (PNG, JPG, WebP), spreadsheets (XLSX, XLS, CSV) or Word documents, up to 10 MB each. A receipt is required before a Reimbursement invoice can be submitted. You can also leave a short message for the reviewer in Notes (optional).
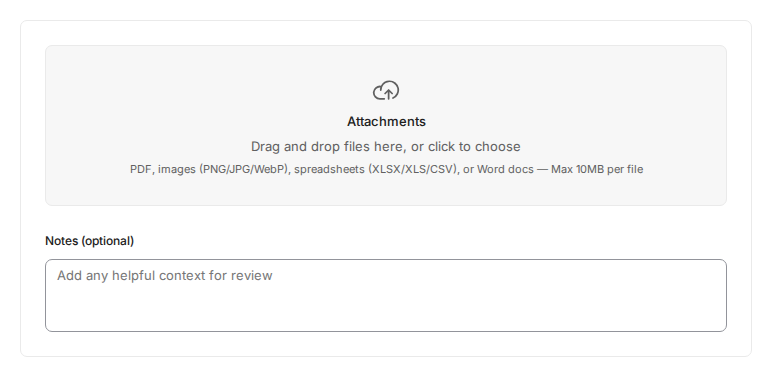
Drag files into the Attachments box, or click it to browse your computer.
Step 9. Click Submit Invoice at the bottom of the window. Success looks like: the window closes and a green message appears - "Invoice submitted. Invoice INV-… has been sent for approval." The invoice now appears in the All tab with the status Pending, and your organization's administrator is notified to review it. If a red message appears instead, read it carefully: it names exactly what to fix (a missing month, a missing receipt, or missing payment details).
Working with drafts
Not ready to submit? Click Save as Draft instead of Submit Invoice. A "Draft saved" message confirms it, the invoice appears in the All tab with a Draft badge, and the Drafts counter at the top goes up.
To continue a draft, find its row in the All (or Draft) tab and click the Edit (pencil) icon on the right. The invoice form reopens with everything you typed. Make your changes, then click Save as Draft again to keep working later, or Submit Invoice to send it for approval.
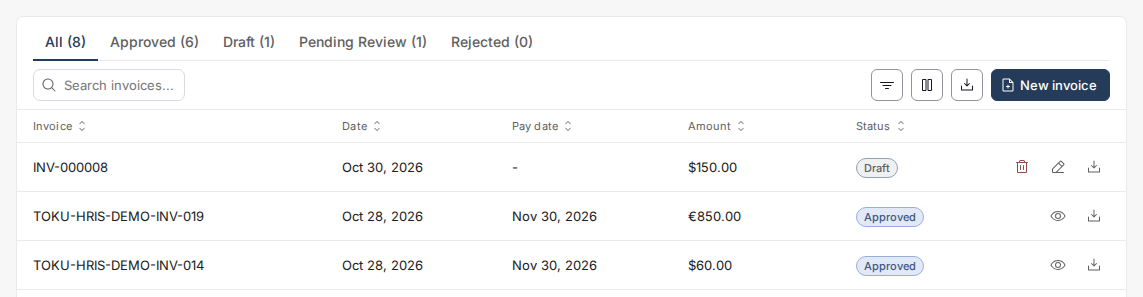
Click the Edit (pencil) icon on a Draft row to reopen and finish the invoice.
Deleting a draft: if you no longer need a draft, find its row in the All (or Draft) tab and click the red trash icon just left of its Edit (pencil) icon (hovering over it shows "Delete draft"). A window titled "Delete draft invoice?" asks "Are you sure you want to delete this draft invoice? This cannot be undone." Click Delete draft to confirm, or Cancel to keep it. Success looks like: the message "Draft invoice deleted" appears and the row disappears from the list. Only drafts can be deleted, so submitted, approved and paid invoices have no trash icon. To remove an invoice you have already submitted, first return it to draft as described in "Fixing a mistake" below; the trash icon appears on the row once it is a draft again. A draft stays in your list until you submit or delete it; Toku does not remove old drafts for you.
After you submit: statuses
Every invoice in the invoices table shows one status. Here is what each means and what, if anything, you should do:
| Status | What it means - and what to do |
|---|---|
| Draft | Only you can see it. It has not been sent to your organization. |
| Pending | Submitted and waiting for your organization's administrator to review it. You can still pull it back - see "Fixing a mistake". |
| Approved | Your administrator accepted it and payment is being scheduled. You can no longer edit it. |
| Rejected | Your administrator declined it. Open the invoice to read the rejection reason, then submit a new, corrected invoice. |
| Cancelled | The invoice was withdrawn and will not be paid. |
| Failed | A payment attempt did not go through. Contact your administrator or support. |
| Paid | The money has been sent to your bank account or wallet. You are done. |
How long approval takes depends on your organization - many review invoices within a few business days. The Scheduled / Submitted / Drafts counters at the top of the Invoices page give you a quick overview at any time.
Fixing a mistake
While it is still Pending: in the All (or Pending Review) tab, click the small red X on the invoice's row (just left of the eye icon). A window titled "Return invoice to draft" explains: "This will withdraw the submitted invoice and move it back to drafts so you can edit and resubmit it." Click Return to draft to confirm. Success looks like: the message "Invoice returned to draft" appears and the status changes back to Draft, where everything is editable again.
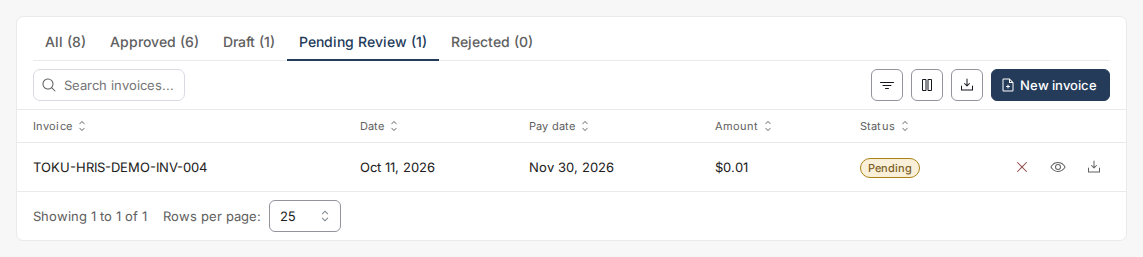
Click the red X on a Pending row to pull the invoice back to draft.
Once it is Approved: you cannot edit or withdraw it yourself - opening it shows "Approved or submitted invoices cannot be edited." Ask your organization's administrator to reject the invoice; as soon as its status is Rejected, submit a new corrected invoice.
If it was Rejected: open the invoice to read the rejection reason at the bottom of the page, then create a new invoice with the corrections and submit it again.
Tracking payment
The Status column of the invoices table is where you follow the money: Pending means waiting for review, Approved means payment is being scheduled, and Paid means the money has been sent to the bank account or wallet saved in your Payment Methods. The download icon at the end of each row saves a PDF copy of the invoice for your records. If an invoice sits in Approved much longer than usual, or shows Failed, contact your organization's administrator.
Still stuck?
Contact Toku support and include: your full name, the organization you invoice, the invoice number (for example INV-000123), which page you were on (the Invoices page or the New Invoice window), what you clicked, what you expected, and what happened instead. A screenshot of the whole window helps enormously. If your contract's currency is missing from the currency list, say so explicitly - support can have currencies added; please do not submit in a different currency in the meantime.
Related guide: Toku: Sign in to your account — what to do if you cannot get past the sign-in screen.