
 6 MIN READ
 UPDATED NOV 3, 2026
For company admins on Toku Employment. Last updated November 3, 2026.
By default, an employee gets the whole year's leave on January 1. With an accrual schedule, a leave type builds up instead: a share every month, or the full yearly total on each anniversary of the employee's start. Toku posts the days for you, and you and your employees can see exactly what has accrued so far.
Before you start
- You need admin access to the Time Off page.
- A schedule works on leave types that have a number of days per year (balance type Accrual or Earned). Unlimited and Flexible Time Off types have nothing to accrue.
- Accruals count from each employee's start date, or from their probation end date if you choose that. Make sure it is filled in on the employee's profile, otherwise nothing accrues for them.
The three schedules
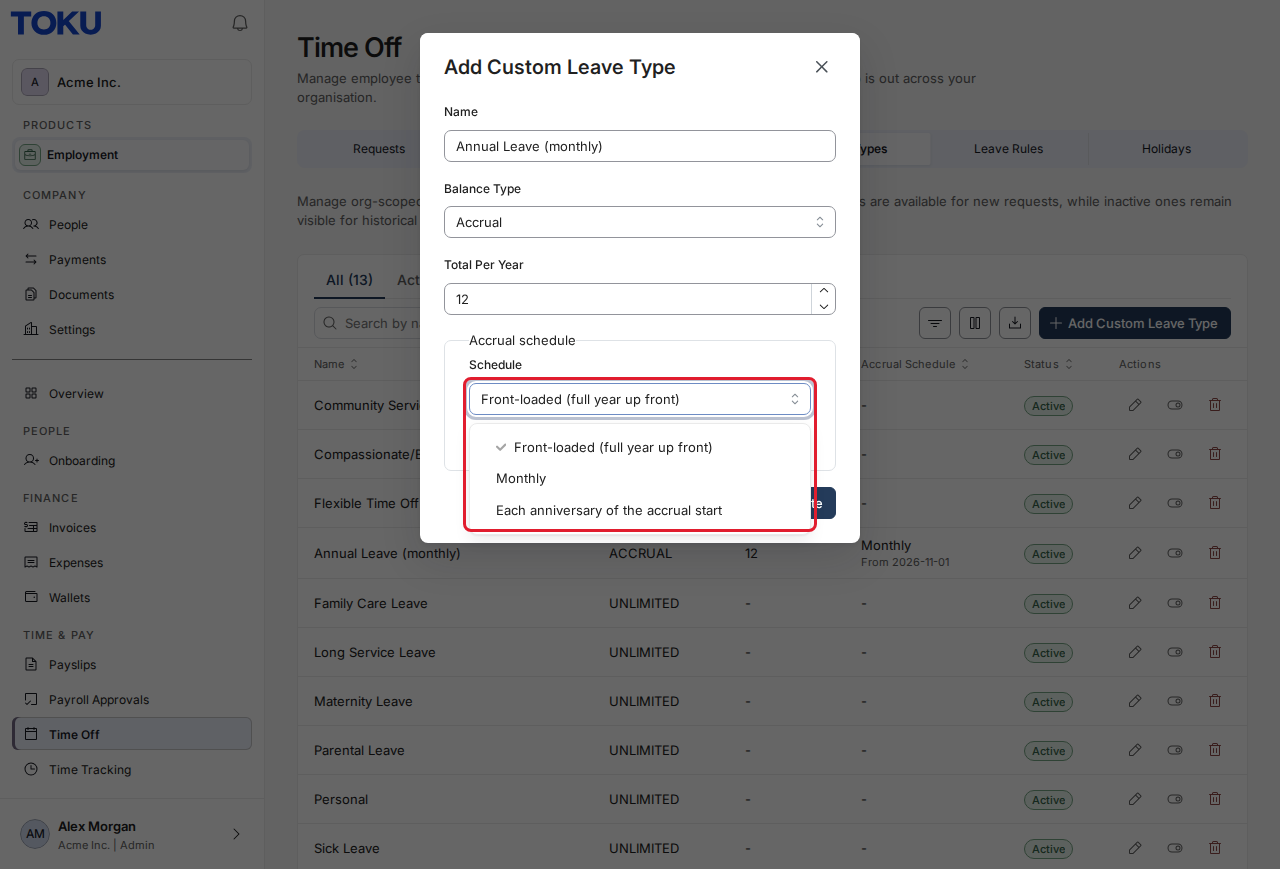
- Front-loaded (full year up front): the whole yearly total is available from the start of the year. This is how every leave type worked before, and it stays the default.
- Monthly: one twelfth of the yearly total is added for each month worked. Toku posts each month's days the day after that month ends.
- Each anniversary of the accrual start: the full yearly total is granted on each anniversary of the employee's hire date (or probation end date). Each new grant replaces the previous year's.
Set a schedule on a custom leave type
Step 1: Open the leave type
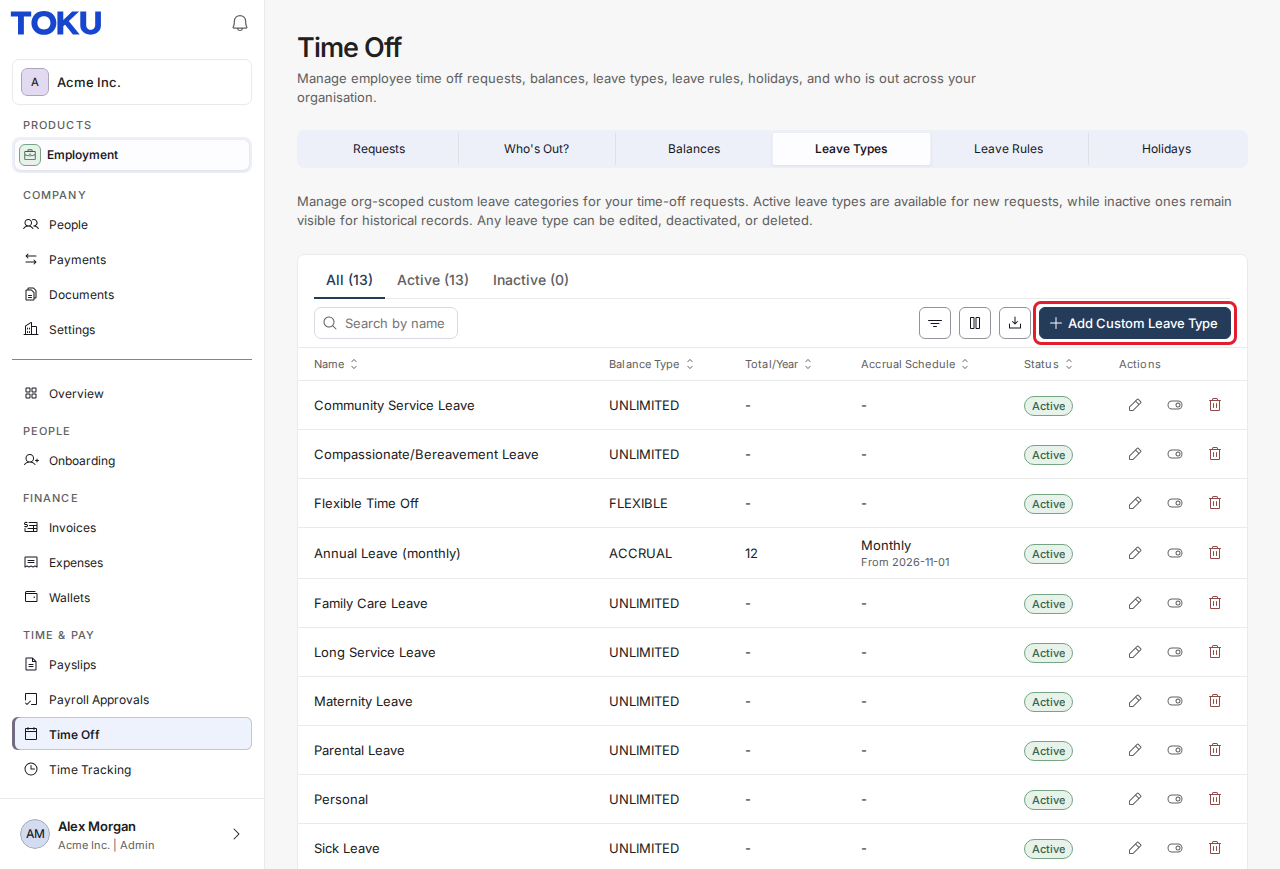
- Select Time Off in the left-hand menu, then select the Leave Types tab.
- Select Add Custom Leave Type. To add a schedule to a type you already have, select the pencil icon in its row instead.
Step 2: Choose the schedule
- Enter a Name, set Balance Type to Accrual and enter the Total Per Year (for example 12 days).
- Under Accrual schedule, open Schedule and pick Monthly or Each anniversary of the accrual start.
Step 3: Fill in the schedule settings
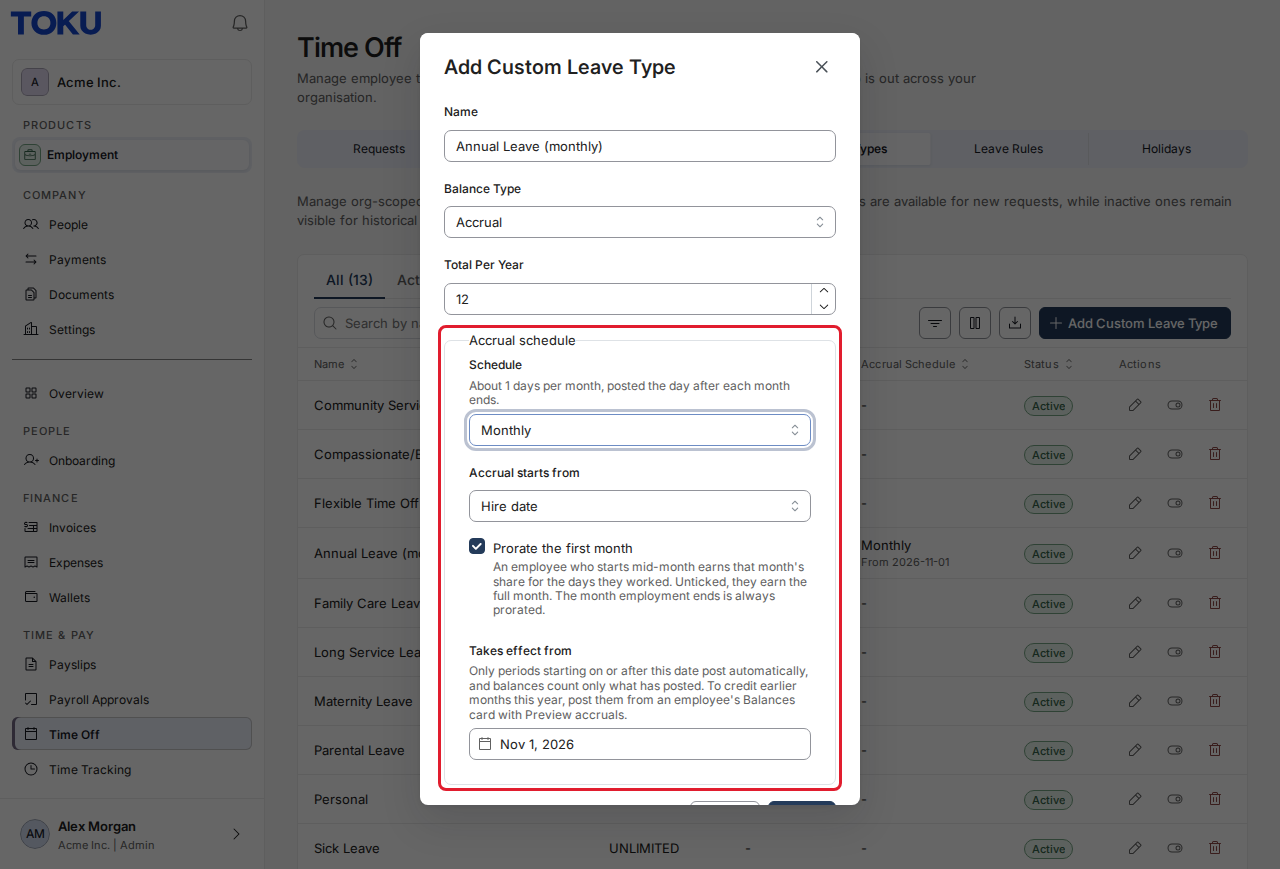
- Accrual starts from: choose Hire date or End of probation.
- Prorate the first month (Monthly only): leave it ticked so that an employee who starts mid-month earns only that month's share for the days they worked. Untick it to give them the full month. The month employment ends is always prorated.
- Takes effect from: the date the schedule starts posting. It defaults to the first day of the current month. Only periods that start on or after this date are posted automatically. You can credit earlier months of this year later, from the employee's balance (see Post earlier months below).
- Select Create (or Save Changes when editing).
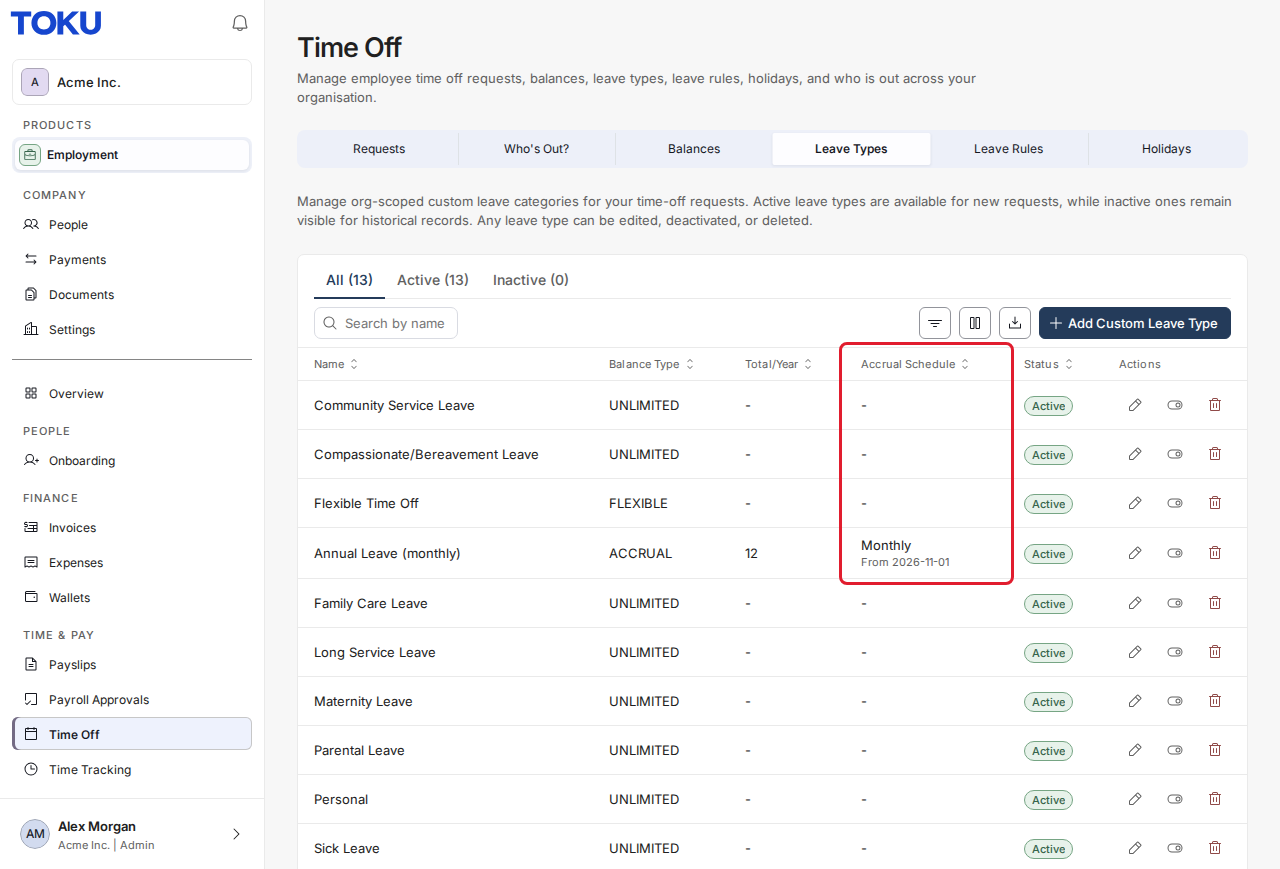
The Accrual Schedule column of the Leave Types table now shows the schedule and its start date, for example "Monthly, From 2026-11-01".
Set a schedule on a built-in leave type (by country)
Built-in leave types such as Vacation follow each country's leave rules, so you set their schedule as a country override.
- On the Time Off page, select the Leave Rules tab.
- Select Add Override at the top of the table and choose the Country and Leave Type, or select the plus icon on the row you want to change.
- Under Accrual schedule, choose the Schedule and fill in the same settings as above.
- Select Add Override. The Accrual column shows the schedule for that country and leave type.
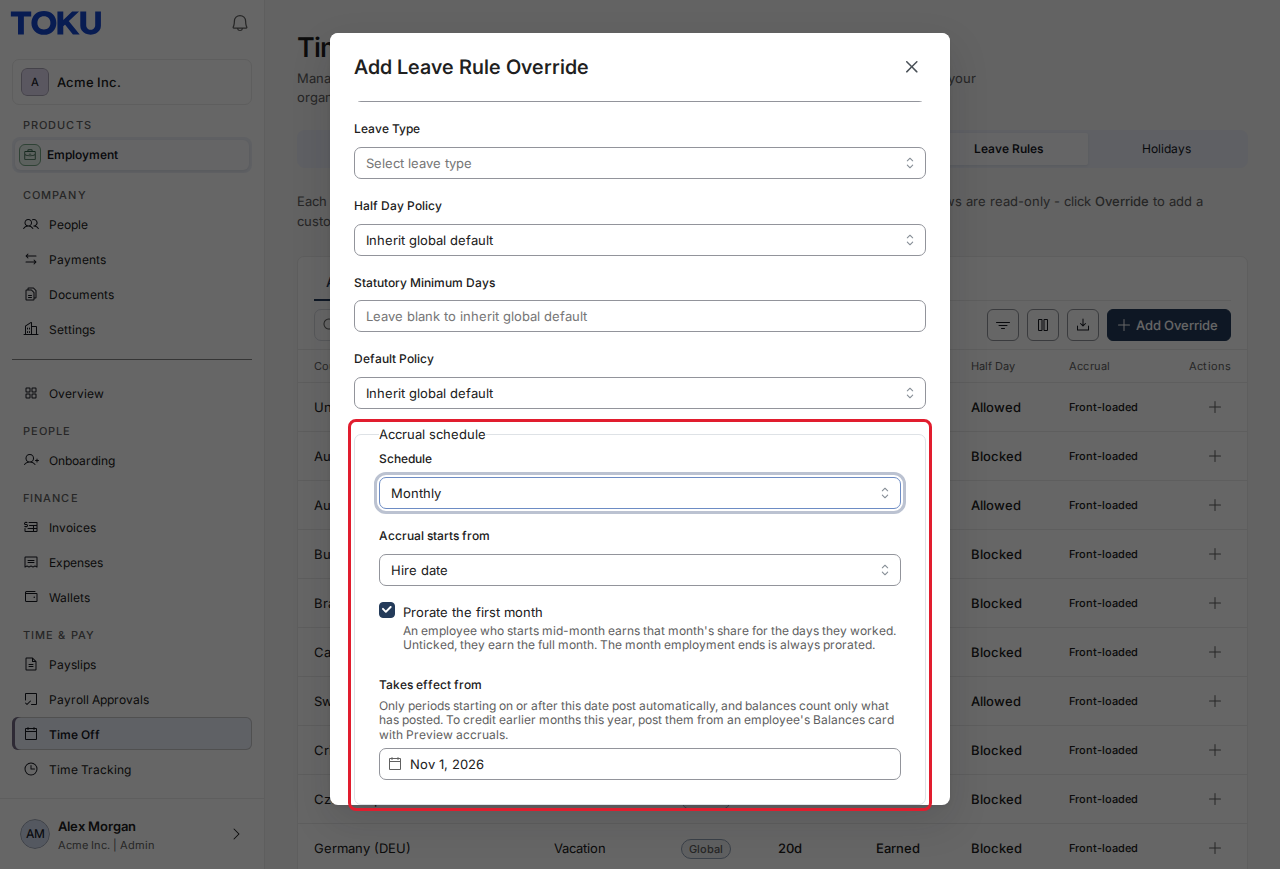
The schedule applies to every employee in that country. Each employee accrues their own Days Per Year, or the country's statutory minimum when they have none. A built-in leave type never accrues less than the statutory minimum: if an employee's own total is lower, the minimum is accrued instead.
See what an employee has accrued
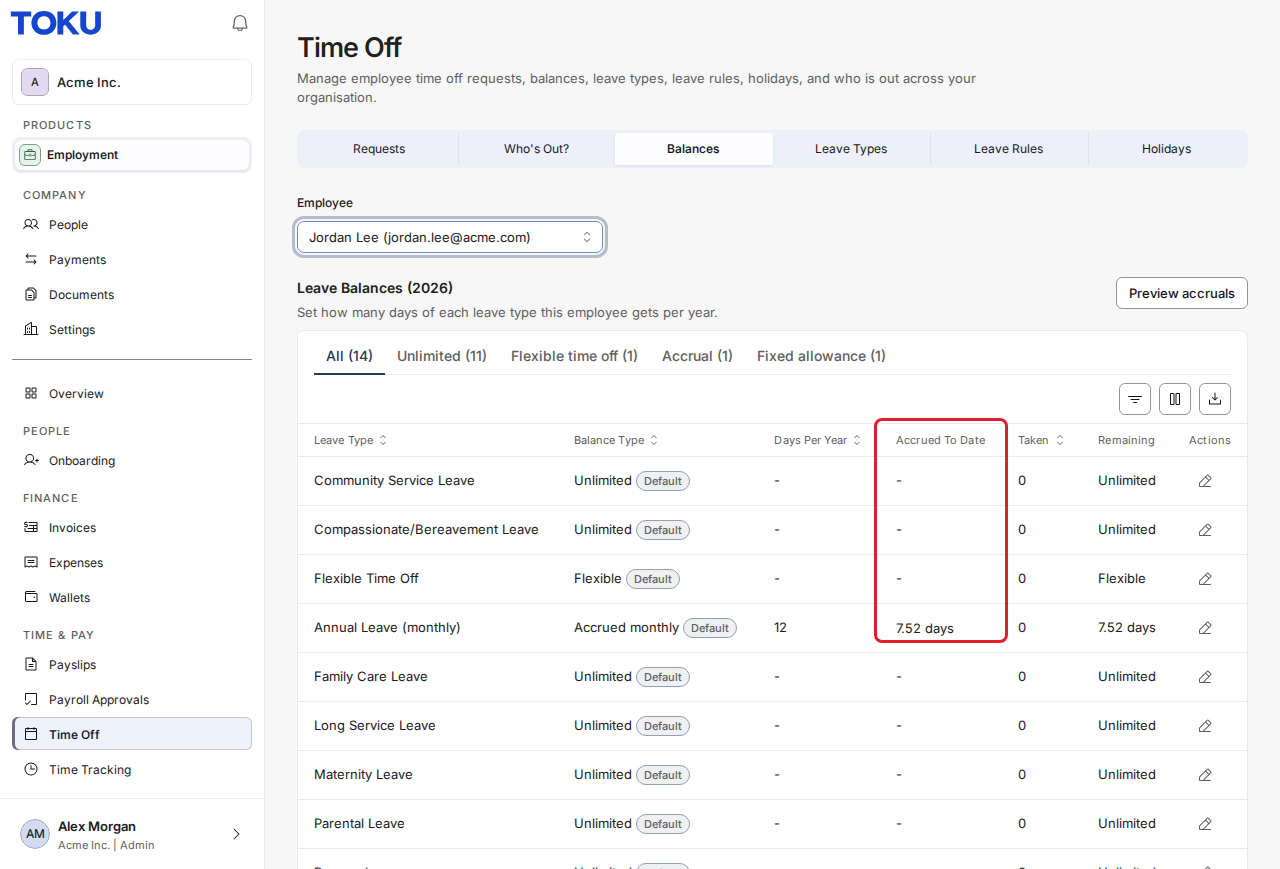
- On the Time Off page, select the Balances tab and choose the person in the Employee list.
- In the Leave Balances card, a leave type with a schedule reads Accrued monthly or Accrued each anniversary under Balance Type. Accrued To Date shows the days posted so far this year, and Remaining is what has accrued minus what has been taken.
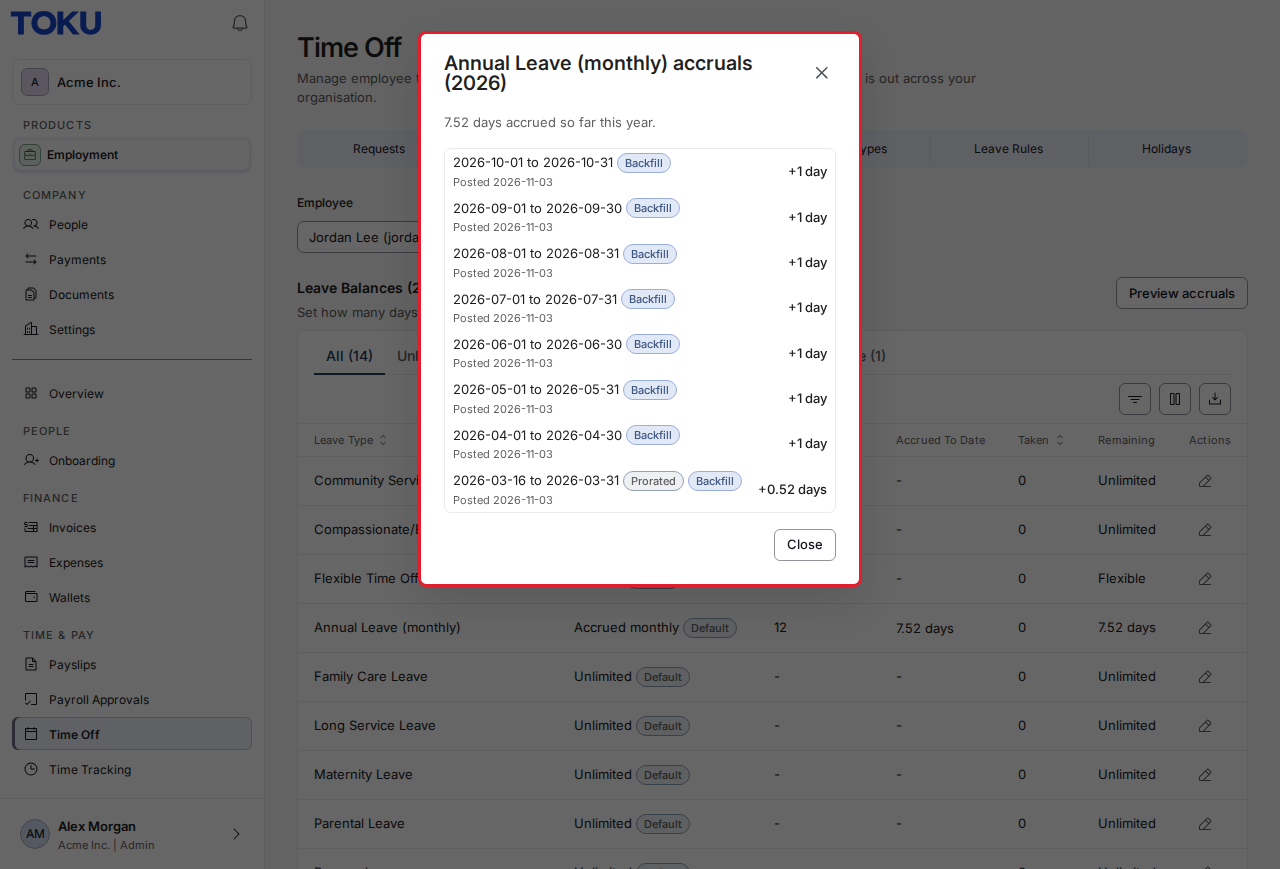
Select the amount under Accrued To Date to open that year's accrual history. Each period shows its dates, the days added and the date it was posted. A Prorated badge marks a part month, and a Backfill badge marks an earlier month you posted yourself.
Post earlier months (backfill)
When a schedule takes effect partway through the year, the months before Takes effect from are not posted automatically. You can check them and post them for one employee at a time.
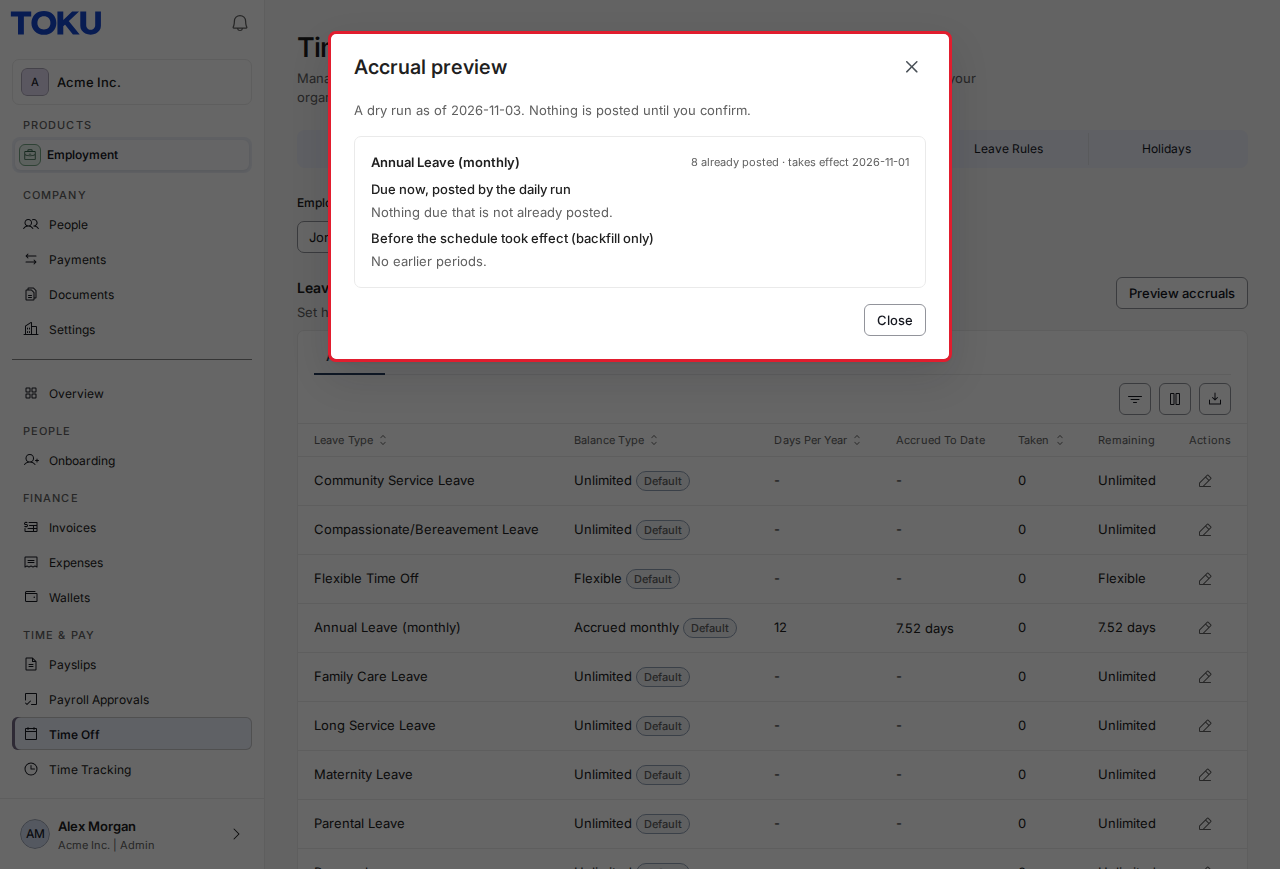
- On the employee's Leave Balances card, select Preview accruals at the top right.
- Read the preview. It is a dry run: nothing is posted until you confirm. For each leave type with a schedule it lists Due now, posted by the daily run and Before the schedule took effect (backfill only).
- If earlier periods are listed, select Post N earlier periods, check the number of periods and days, then select Confirm: post N periods. They appear in the accrual history with a Backfill badge. Select Cancel instead to go back without posting.
What employees see
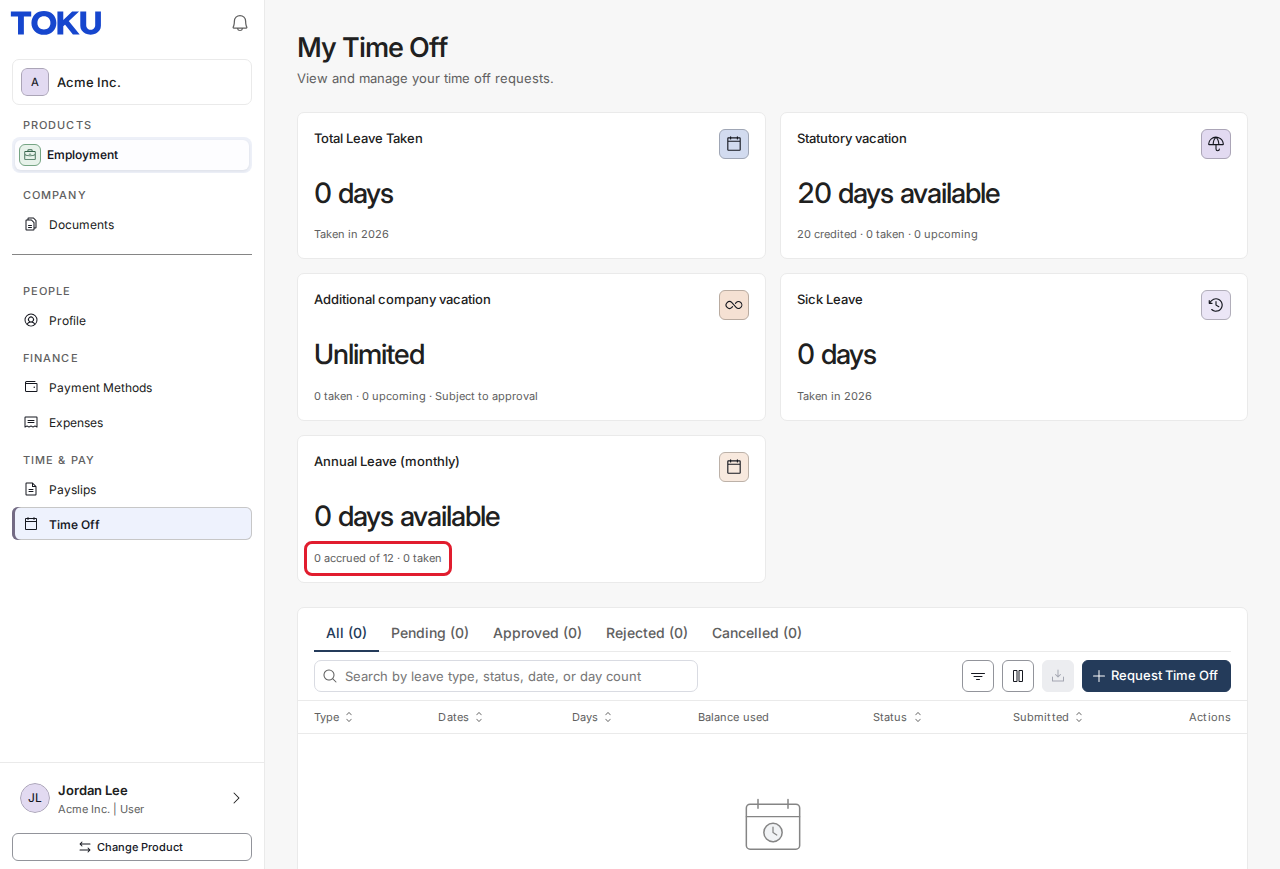
On their My Time Off page, employees see a card for each leave type with a balance. For a leave type that accrues, the card shows the days available now and how much has accrued out of the yearly total, for example "0 accrued of 12 · 0 taken".
Good to know
- Switching a leave type back to Front-loaded (full year up front) makes the whole yearly total available again from the start of the year.
- Accruals stop at the employee's last working day.
- The Preview accruals button only appears when the employee has at least one leave type with a schedule.
- Days are shown to two decimal places. For example, on a 12-day monthly schedule an employee who started on March 16 earns 0.52 days for March.
Still stuck?
You can email customer-success@toku.com to reach our support team. Please include your email address, organization name, and a description of what happened. Screenshots and videos are always welcome to speed up the troubleshooting process.